For the past three years, I’ve been putting off an upgrade to my network’s firewall. During that time, I was balancing multiple priorities: maintaining uptime with multiple ISPs, managing VPN performance limitations, and constantly watching the market for hardware that could check all the boxes without blowing the budget.
I knew I needed better throughput, more flexibility, and a firewall with features worth learning. But every option seemed to involve some compromise I wasn’t ready to make. Not because I couldn’t find options, but because the right one just hadn’t shown up, until now.
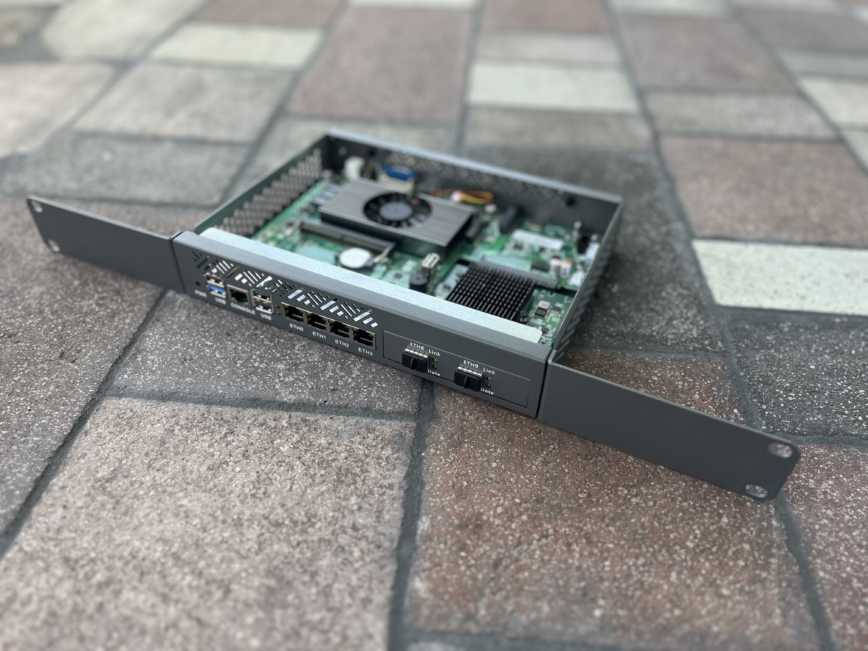
My new 1U Firewall Appliance for pfSense (top off and ears on).
I recently unboxed a compact, rack-mountable firewall appliance that checks nearly every box I’ve had in mind since wanting to move away from the Peplink Balance 20X. This is Part 1 of a new series documenting the full journey: unboxing, setup, OS choices (pfSense, OPNsense, OpenWrt), and real-world performance testing.
Let’s start with the backstory and a look at the hardware.
Update! — Part 2 is up: pfSense Firewall Config: My Settings with Screenshots.
In This Article
Why I Initially Chose the Peplink Balance 20X
After hurricanes Irma and Maria in 2017, the internet on my island was inconsistent at best. I needed a multi-WAN setup that could intelligently manage three ISPs. Two wired and one wireless via SIM card. The Peplink Balance 20X delivered perfectly on that front.
Its strength was in seamless load balancing and failover. I was able to route traffic across all three ISPs with minimal hassle, using Peplink’s built-in algorithms. During storms, the SIM card slot provided a reliable fallback to wired internet.
But its firewall was basic. I was running the entire network (servers, IP cameras, smart TVs) through a VPN tunnel. And that’s where I began to hit the wall. The Balance 20X is only capable of about 25 Mbps throughput using OpenVPN, and it has no WireGuard support. That became a serious bottleneck over time as my usage increased, but also my main ISP bandwidth was upgraded from 60Mbps to 300Mbps when ISPs started upgrading customers to fiber internet.
Also read: Peplink Balance 20x Router Review.
Why the Upgrade Took 3 Years
After switching from the EdgeRouter 10x to the Peplink Balance 20X, I had every intention of sticking with it for a few years, and I did. But almost immediately, I started keeping a mental list of what I wanted in its eventual replacement. By 2023, I was casually browsing forums and spec sheets for potential upgrades. And by late 2024, it became clear that I needed something more powerful, more flexible, and more future-proof.
During that time, I seriously looked at:
- Firewalla Gold Plus – clean UI, decent community, and some clever features — but at nearly $1000 with rackmount kit, the value just wasn’t there. It’s underpowered, especially for heavy VPN use. OpenVPN speeds aren’t great, and the software stack is too closed for me to take the jump. — $600 + $120 rack mount.
- UDM-Pro-Max – for the price, even this model with the 2.0 GHz ARM CPU is underwhelming. It’s tied to Ubiquiti’s cloud and doesn’t offer the same flexibility. I wanted full VPN support with speeds of at least 300 Mbps up/down — UDM-Pro* can’t deliver those speeds. — $600 + $99/yr CyberSecure.
- Fortinet 60F – great features, but the licensing fees are just too much for a home office. It’s really geared for enterprise. — $300 + $300 to 600/yr license.
- Protectli / Qotom / many other boxes – hit or miss on ports, spec options, or CPU performance.
The biggest dealbreakers? Price, proprietary restrictions, and lack of 10G SFP ports. My main ISP now terminates directly to my homelab via fiber, and I needed at least one WAN interface with SFP support.
There are just so many options. I spent literally a year going over them, watching YouTube videos, posting in forums, Reddit subs, and researching.

My YouTube watch history: Watched no less than 100 related videos over the past 3 years.
I also didn’t want to be limited, again, by low CPU specs. Most gear on the market couldn’t keep up with the VPN throughput I needed without choking. WireGuard, OpenVPN, NordVPN, all need decent CPU power to avoid bottlenecks.
This wasn’t just about specs, it was about finding something that could grow with my homelab over the next five to ten years. That’s what kept me waiting until the right box came along.
Also read: My Quest for the Ultimate Home Office Firewall — Ok, well, Part 2. (and Part 1)
1U pfSense Firewall Appliance Specs + Why it Made the Cut
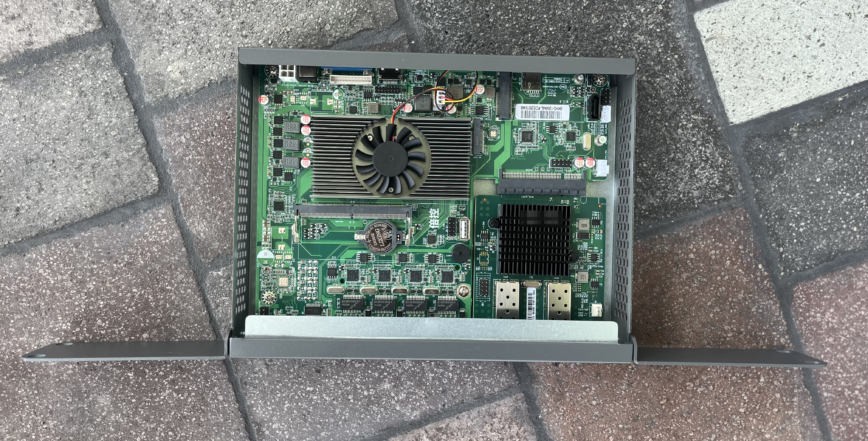
What pushed me to finally upgrade was finding this small form factor all-metal box for under $300, including shipping. And unlike the Firewalla, it delivers on performance.
Here are the specs of this firewall appliance:
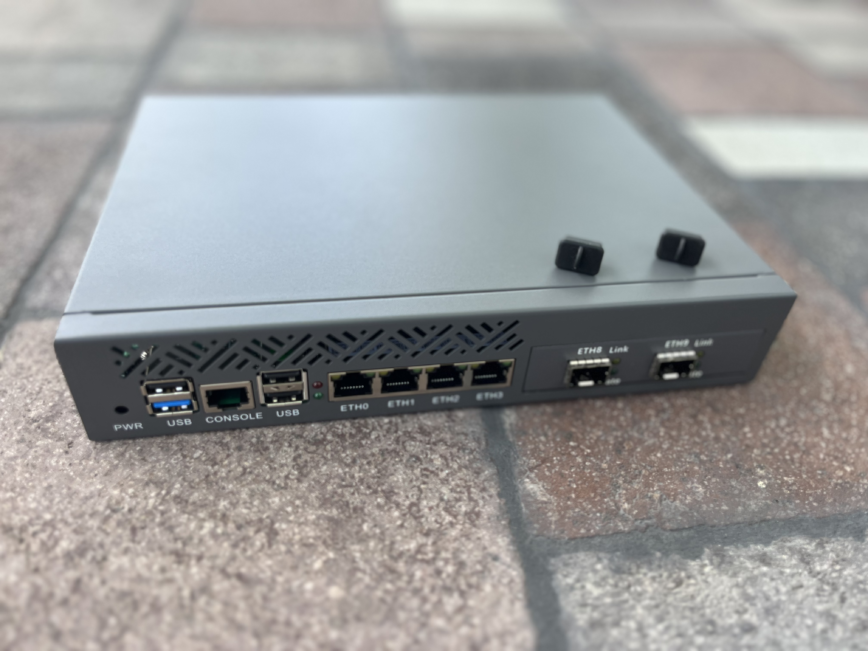
- Intel Alder Lake N100 CPU (4C/4T, 6W TDP)
- 4x Intel i226-V 2.5G LAN ports
- PCIe x8 expansion slot with support for 2x or 4x 10G SFP+ modules. (I opted for 2x SFP)
- M.2 NVMe + SATA support + Mini PCIe support
- 1x HDMI, 1x VGA for console
- Only one fan — the Intel N100 CPU — (quiet operation)
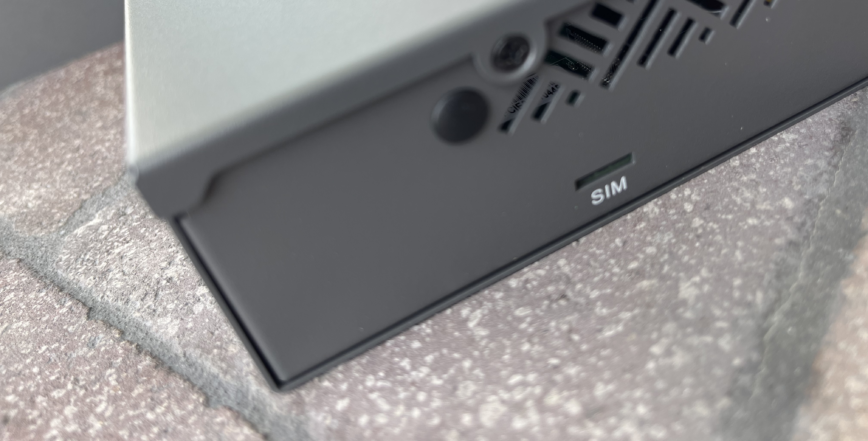
- Micro SIM slot for optional LTE ISP connection (or Wi-Fi card) with 2 antenna holes (black rubber plugged holes)
I’m building this into my 19″ by 14” deep rack, and the small form factor was a big part of the appeal. It will fit above or below my Lenovo Tiny servers and maintains a similar (likely cooler) thermal profile. Just like those, apart from the single CPU fan, this unit also relies on passive cooling.
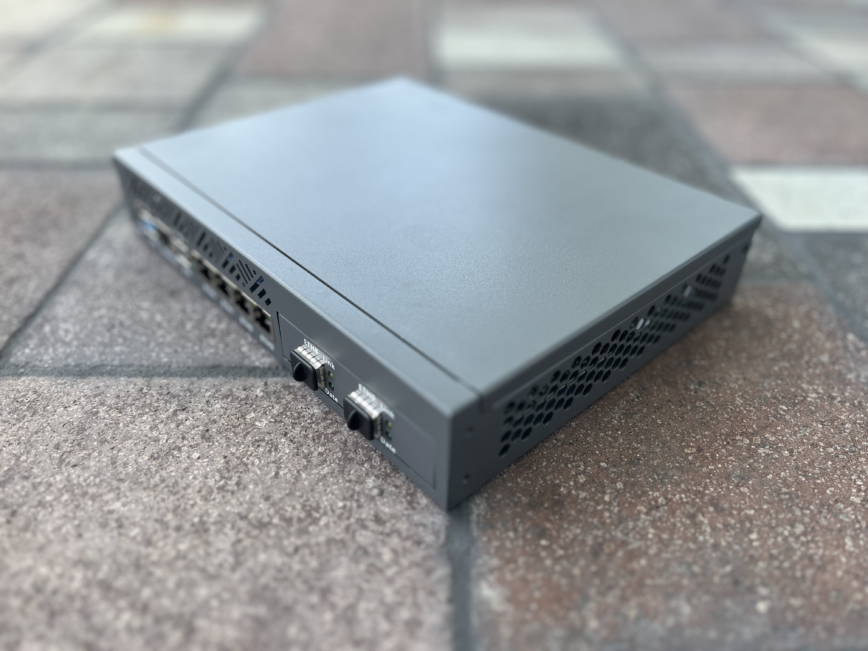
Out of the box, build quality feels excellent for a sub-$300 unit. No flimsy plastics, and the metal chassis has generous venting all around the four sides. Simple and serviceable. I paid $288.06 to a Chinese supplier (including shipping), but, when it arrived, to collect it I also had to pay customs/government imports tariffs, tax, and handling fees, which brought the total up to $343.61. I prefer not to endorse or link to this device until I’ve verified its stability and performance in real-world use. If you prefer to take the jump, I’m sure you’ll find it online.
Minor Gripes (Nothing Major)
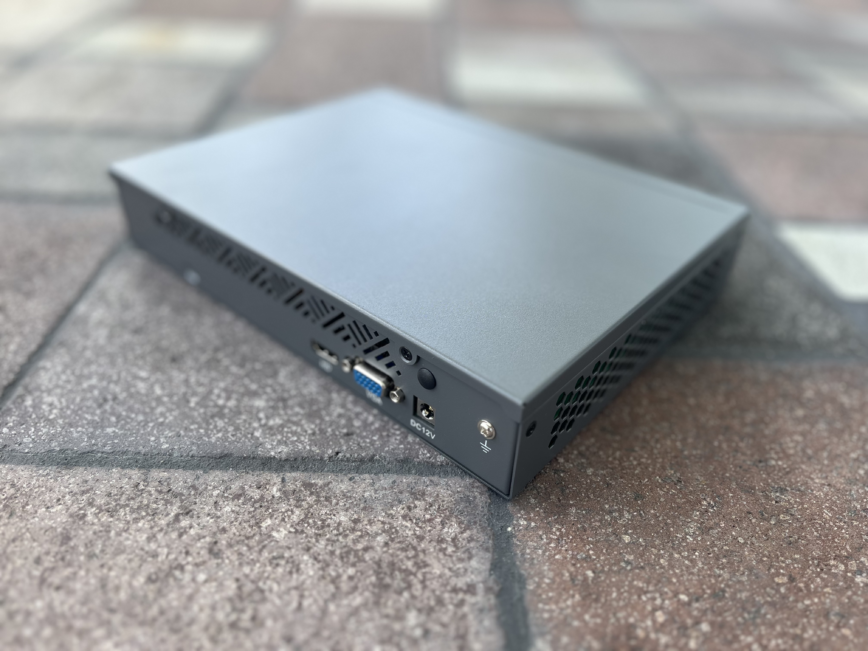
- No built-in 10GBase-T, but 2x 10G SFP+ ports support makes up for it.
- Only one RAM slot, though it supports DDR5, 4800MHz SODIMM.
- Gray exterior — not my first choice. I may respray it matte black or dark red.
Looking Ahead: Firewall Goals and Features I Plan To Explore
Beyond VPN performance and VLAN setup, I’m looking to go deeper into more advanced firewall capabilities. With pfSense, I’ll finally be able to explore features like:
- pfBlockerNG — for DNS-based filtering, geo-blocking, and ad blocking.
- Snort or Suricata — for intrusion detection and prevention.
- Fine-grained rule sets to segment traffic, isolate devices, and improve security posture overall.
- Will also be testing pfSense Community Edition 2.8 Beta. (Release April 1st 2025)
These are the kinds of tools I’ve wanted to work with for a while. Now that I have hardware that can handle them properly, I can start learning and tuning without the performance ceiling and other limitations I had before.
What’s Next — Part 2!
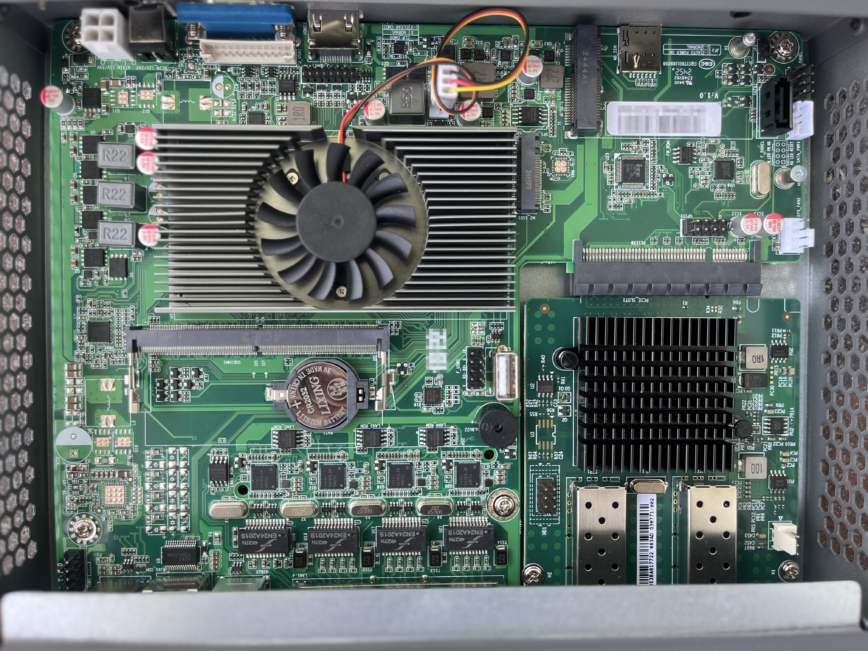
x1 RAM stick up to 32 GB, x1 NVMe M.2 2280, x1
I’ve ordered an 8 GB DDR5 stick for $20 on Amazon, and I already have a $30 256 GB NVMe drive ready to drop in. Once the memory arrives, I’ll install pfSense and start customizing the network stack.
I plan to test a number of key configurations to get the most out of the new hardware. I’ll be configuring VLAN segmentation to isolate homelab servers, IoT devices and smart home gear. I’ll also set up multiple VPN clients to route specific traffic through different tunnels, and crafting granular firewall rules to enforce strict control over both inbound and outbound flows. Oh, and I’m also looking forward to setting up DNS filtering, custom DHCP scopes, and traffic prioritization based on service or device type.
In Part 2, I’ll cover:
- pfSense install and configuration.
- VPN performance testing (WireGuard and OpenVPN benchmarks).
- Firewall rules, traffic shaping, and DNS filters.
- Real-world throughput and idle power usage.
This will be a deep dive into network security, performance tuning, and homelab optimization — the kind of control I never had with the Peplink.
If you haven’t read my previous Peplink Balance 20X Review, it’s worth checking out for more context.
Also see: Home Lab Beginners guide (Hardware):
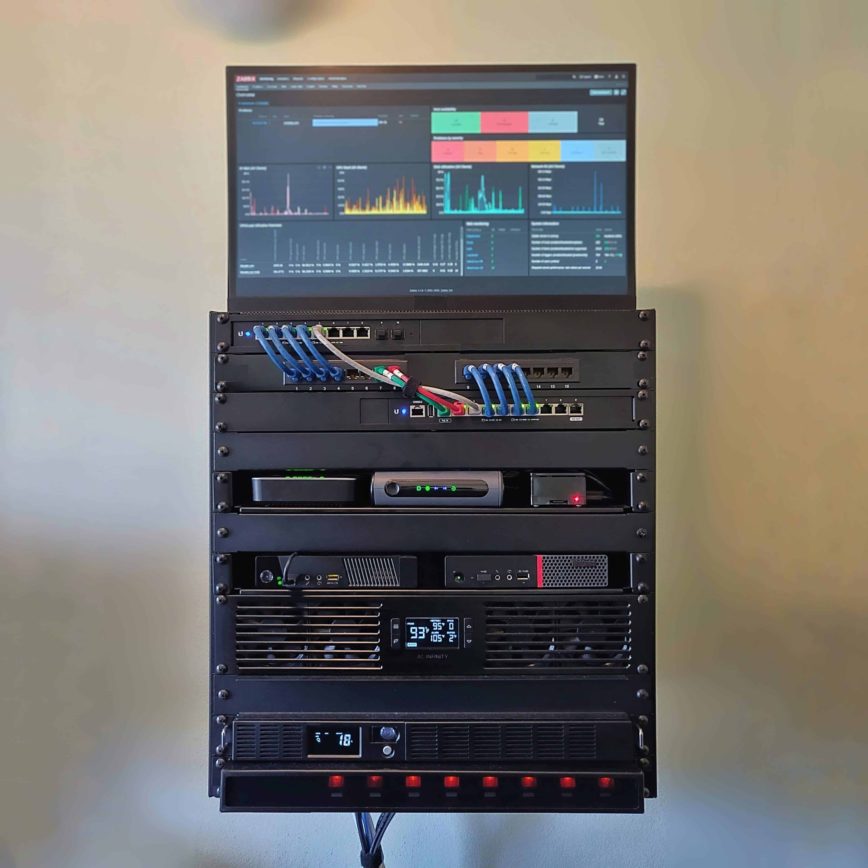
It all started with the above homelab, which, as you know, always feels incomplete. lol
Stay tuned! — Subscribe to my newsletter for part 2 (RAM and NVMe install, 10G SFP+ switch upgrade, SFP+ modules, first boot, pfSense install) and 3 (pfSense config, VPN testing, post speed testing, power consumption, etc.)


