
Jun 27, 2025

The WooCommerce product gallery is the section on a product page where you display images of your product. It’s a great way to show off different angles, colors, or styles. It helps shoppers get a better look before they buy.
But you don’t have to stop at photos. You can customize the WooCommerce product gallery to include a video. This gives customers an engaging way to see your product in action.
In this guide, we’ll show you how to add video to the WooCommerce product gallery step by step.
Why use product videos in a WooCommerce store?
A video can do what photos and text can’t: bring your product to life. Adding a video to your WooCommerce product gallery helps customers connect with your product and feel more confident about buying. The key benefits are outlined below.
- Show the product in action. Multimedia content gives potential buyers a better sense of how the product looks, moves, and functions in real-world use. It’s especially helpful for complex or interactive items that are hard to judge through photos alone.
- Build trust and credibility. High-quality videos help shoppers see the details up close. When customers can see the actual product in use, they’re more likely to trust your brand and feel confident that what they see is what they’ll get.
- Reduces product returns. When customers know exactly what to expect, they’re less likely to post disappointed feedback or to send the item back. A clear, accurate video reduces confusion and sets realistic expectations about size, function, and quality.
- Keeps visitors on your page longer. Videos grab attention and encourage shoppers to spend more time on the product page learning about the product. This extra time can increase engagement and signal to search engines that your page is valuable.
- Boosts conversion rates. Seeing a product in action can help a customer make a faster, more confident buying decision. Video also helps answer questions before they’re asked, which can eliminate doubts that might stop someone from clicking “Add to cart.”
- Sets your store apart. Not every WooCommerce store uses video, so adding one can help your product page stand out from the competition. It gives your brand a modern, polished feel and shows that you care about the customer experience.
How to add a product video to WooCommerce using a plugin
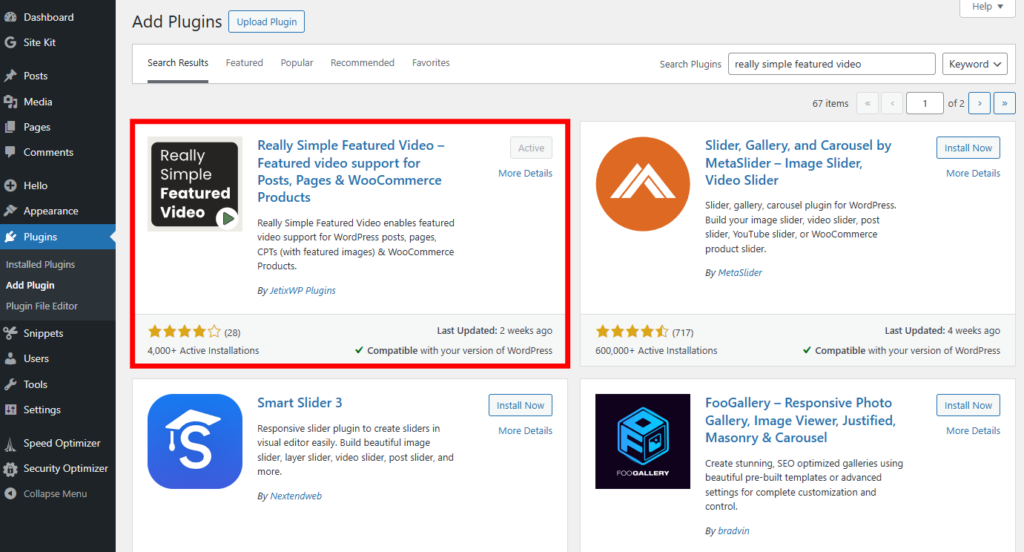
WordPress Core doesn’t include the option to add a video to the WooCommerce product gallery, so you’ll need a third-party plugin. We recommend Really Simple Featured Video.
This tool is one of the best WooCommerce plugins due to its simplicity and quick setup. It lets you add video content to your WooCommerce product gallery images with just a few clicks.
There’s an easy-to-use video settings panel with options to customize your galleries.
Before you get started, you will need a video file of your product or the destination of your video (such as YouTube URL).
Let’s walk through the steps to add video to your WooCommerce product gallery:
- Install and activate the Really Simple Featured Video plugin. If you’ve never loaded a plugin before, read our guide on installing WordPress plugins.
- After activating the plugin, go to Settings → Really Simple Featured Video in your WordPress dashboard.
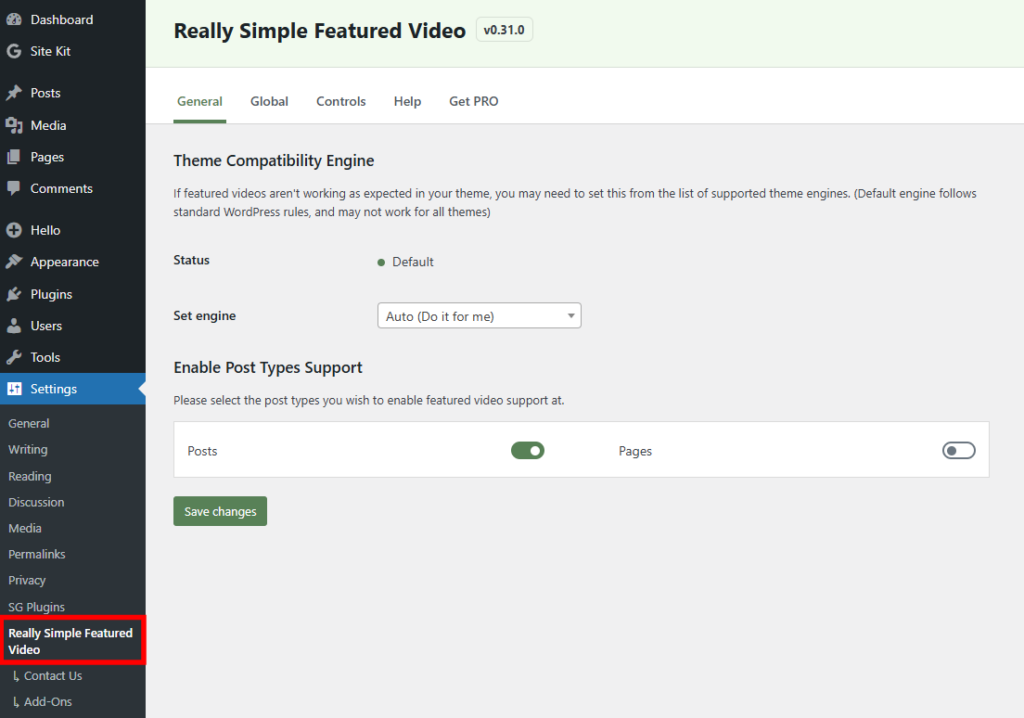
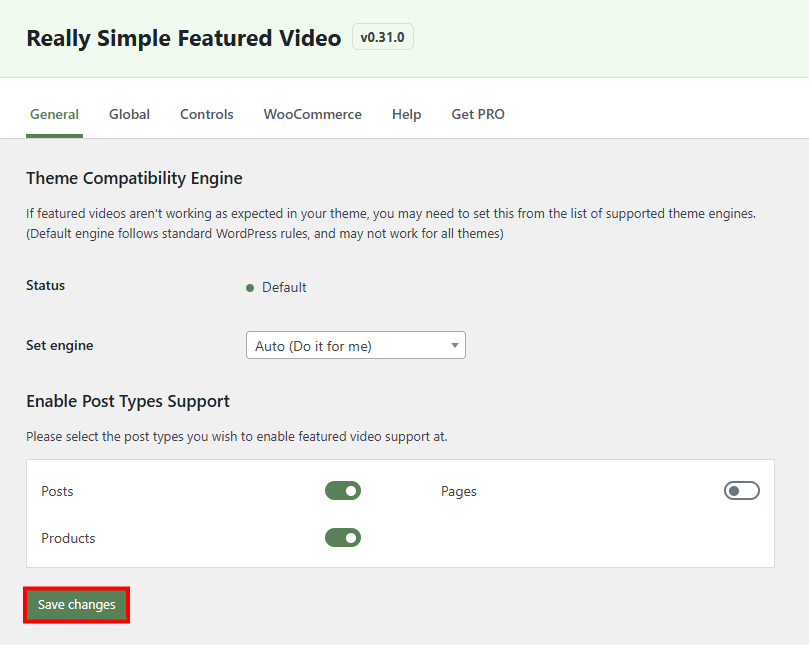
- Toggle the Products switch to the enabled position. This enables featured video support on your product pages.
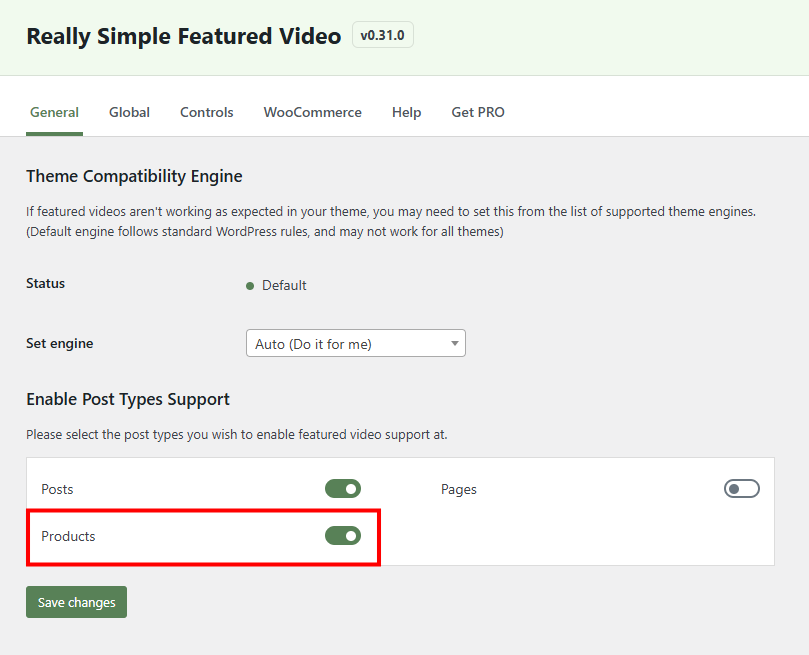
- Click Save changes to store your settings.
- Next, switch to the Controls tab. This is where you configure the functions and control options of your videos.
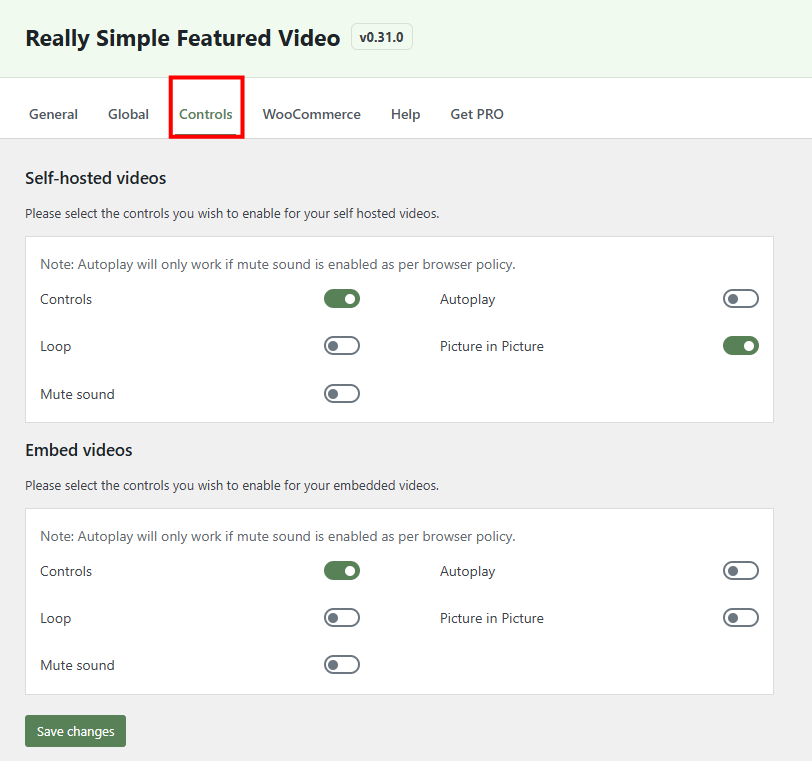
- Make your choices for the video controls. Click Save changes when you’re finished.
- Controls – toggle whether the video has control buttons like play and pause.
- Loop – determines whether the video loops automatically at the end.
- Mute Sound – toggle whether to mute the video by default.
- Autoplay – determine whether the video plays automatically. This only works if videos are muted.
- Picture in Picture – Toggle whether users can interact with other content on the page while the video plays.
- Go to the WooCommerce tab.
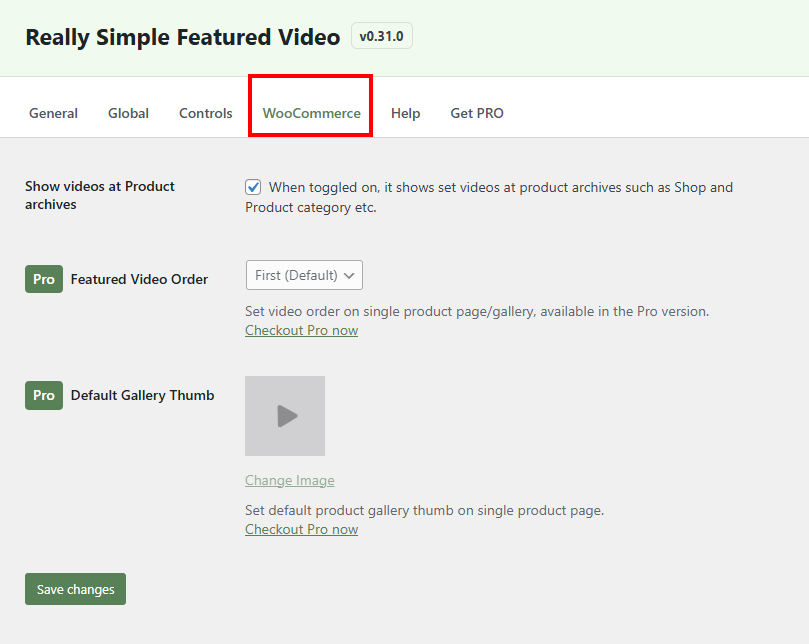
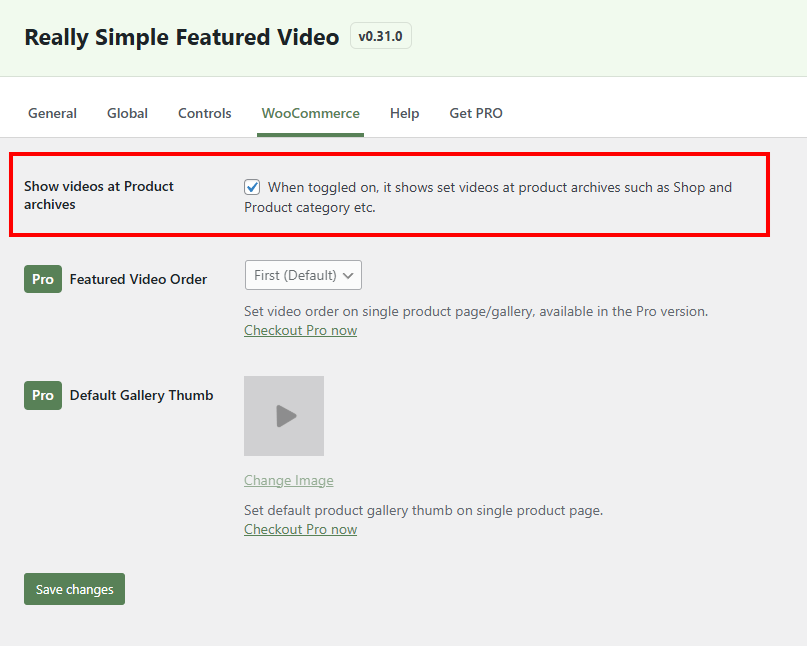
- If you want to show videos on product archives pages (such as Shop page and Product category pages), check the box next to Show videos at Product archives. Click Save changes when you’re finished.
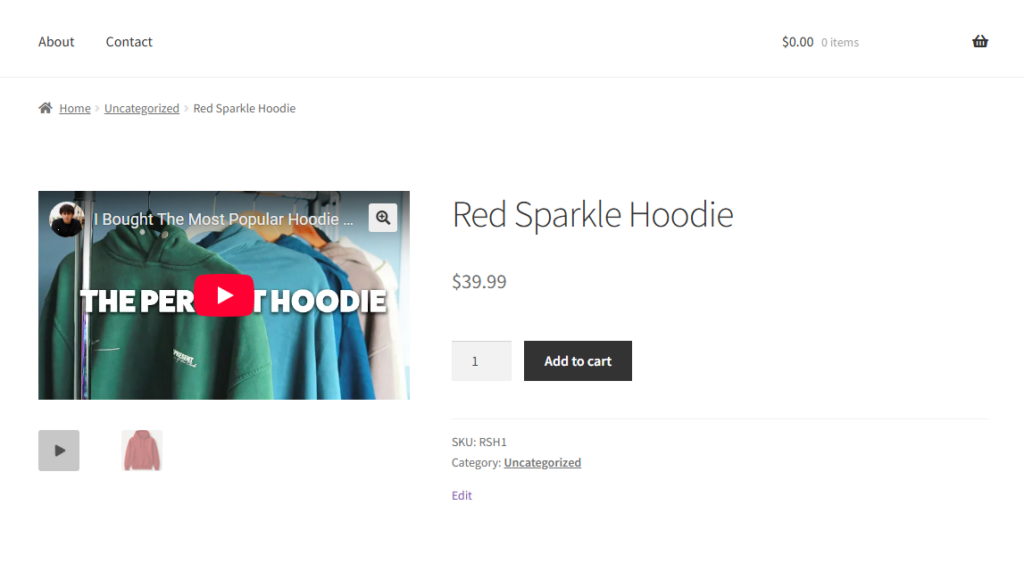
By default, the free version of the Really Simple Featured Video plugin displays the video as the first item in the product gallery. This means customers will see the video right away. They will need to click through the product gallery icons to see your still images.
You’ll need to upgrade to the Pro version of the plugin to adjust the order of product image gallery items, as well as to set a default gallery thumbnail for the video. The cost is $59 for one site.
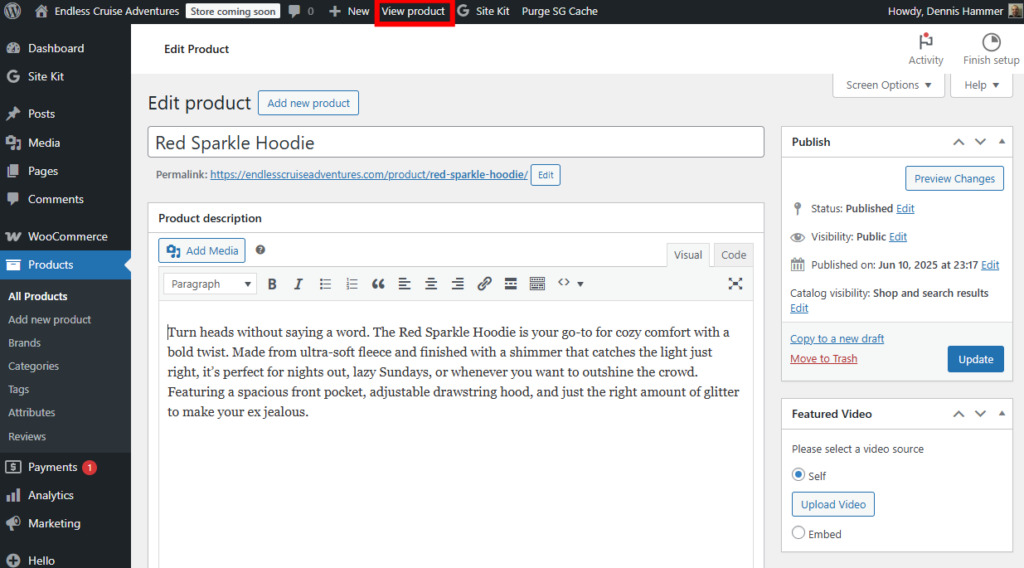
- Now it’s time to add a product video to a WooCommerce product. Head over to Products → All Products.

- Click the name of any product to open the editor.
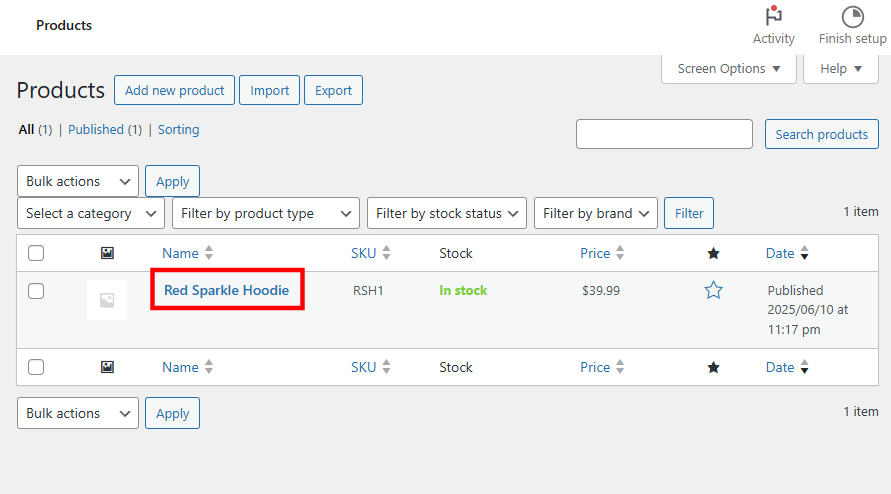
- Find the Featured Video section in the right column.
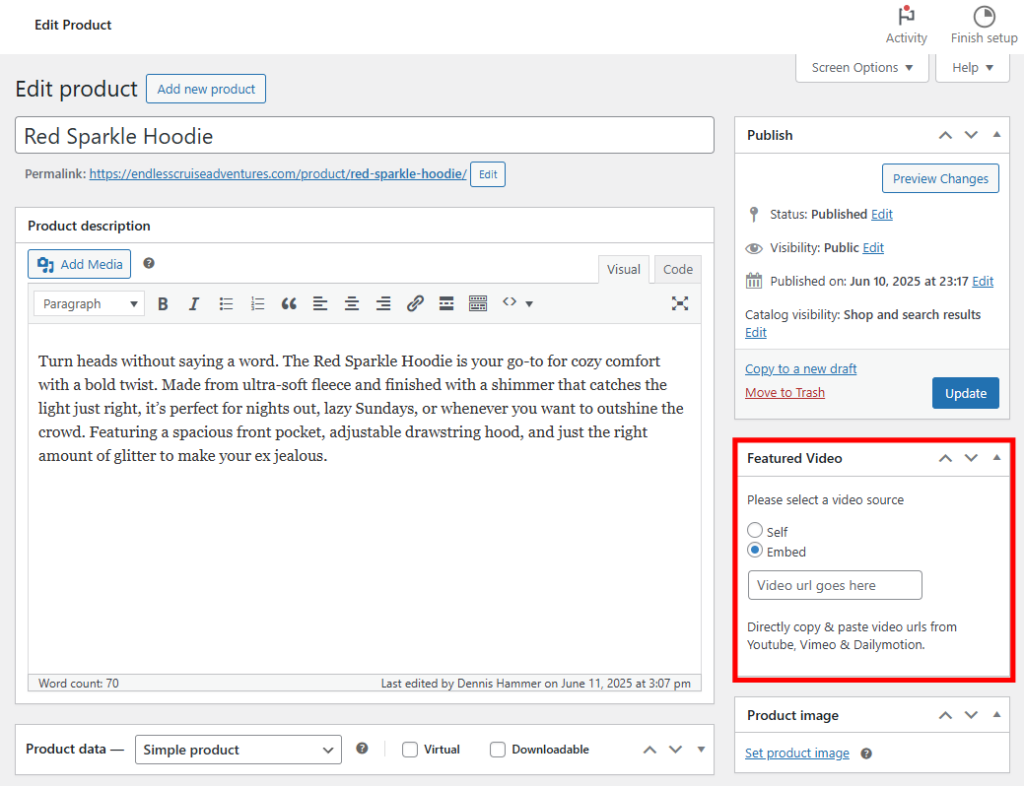
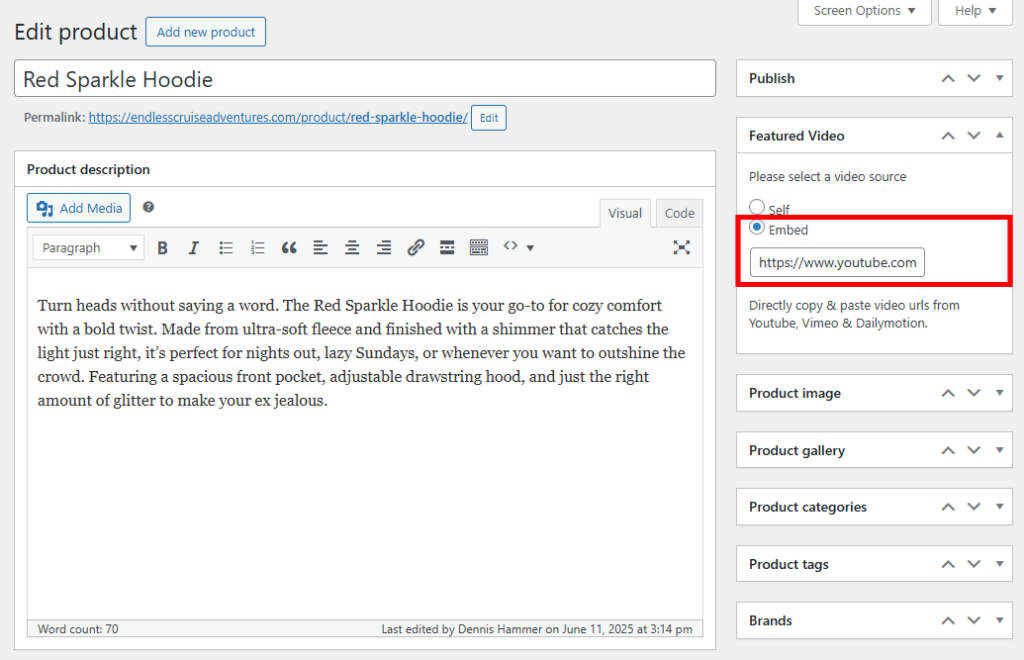
- If you want to embed a video from another source, select the Embed option and paste in a Vimeo, Dailymotion, or YouTube video URL.
- If you want to use a self-hosted WooCommerce product video, select the Self option. Then click the Upload Video button and choose a video from the WordPress Media Library.

Important! We don’t recommend uploading videos directly to your WordPress website. Videos can slow down your site and fill your storage. Third-party platforms like YouTube are usually the better option because they’re optimized for streaming.
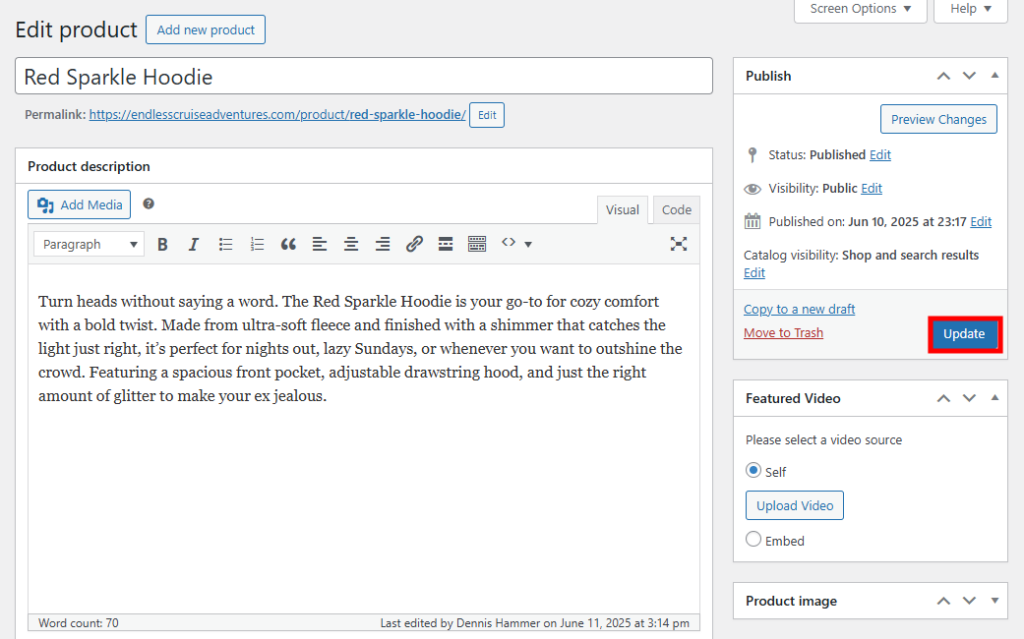
- Click the Update or Publish button at the top to save your changes.
- Click the View Product button at the top of the page (in the WordPress admin bar)
- Check that the video appears in the product gallery on the front end of your ecommerce store.
Best practices for adding videos to WooCommerce
Here’s how to get the best results when adding video to your WooCommerce product gallery:
Upload videos to a third-party platform
Don’t upload videos directly to your WordPress media library. Instead, use a platform like YouTube or Vimeo to host your videos, then embed the video in WordPress. This will speed up WooCommerce by reducing the load on your server, and will help videos play faster and more reliably.
This approach also makes your videos discoverable on other platforms. Make sure to link to your product page in the video’s description so potential customers can find your site.
Use the correct video format
MP4 is the most widely supported format and works across all modern browsers and devices. It provides a good balance between video quality and file size. Avoid using formats that may cause playback issues.
Online Converter and Free Video Converter are useful tools to convert video files if yours is not currently in MP4 format.
Keep the video short and focused
Aim for a video length between 30 and 90 seconds. This is enough time to highlight key features without losing your viewer’s attention.
Focus on what matters most to your customer, such as how the product looks, works, and helps them. Show all angles of the product. Use appropriate lighting conditions.
Choose an eye-catching thumbnail
Your video thumbnail is the first thing people see, so make it count. A strong thumbnail can improve clicks and engagement. Use a clear, high-quality image that shows the product in action or highlights its best feature.
Make sure the video is mobile-friendly
Most online shoppers browse from their phones, so it’s important to make the experience mobile-friendly, including your videos. Test your video on different screen sizes to make sure it loads quickly, looks good, and is easy to watch.
Add captions or text overlays
Many people watch videos without sound, especially on mobile. Adding captions or text overlays helps deliver your message even when the audio is off. It also improves accessibility for users with hearing impairments.
Show real use cases or product demonstrations
Don’t just describe the product. Show it being used by people who resemble your customers. Demonstrating how the product works in real life helps build trust and makes it easier for potential customers to imagine using it themselves.
Conclusion
Adding video to your product pages is one of the easiest ways to improve customer engagement and boost sales. Whether you’re showcasing how a product works or highlighting its key features, video helps shoppers feel more confident about their purchase.
Now that you know how to add a video to the WooCommerce product gallery, you can give your store a more dynamic, professional look. Just follow the steps in this tutorial and use the best practices we provided to create a better experience for your customers.
Add video to the WooCommerce product gallery FAQ
Can I add multiple videos to a single WooCommerce product gallery?
Yes, you can add more than one video to a product image gallery using the right plugin or theme features. Some tools let you insert multiple videos alongside your product images so you can give your customers various ways to examine your products.
Will adding videos slow down my product pages?
Not if you host the videos on a third-party platform like YouTube or Vimeo. Embedding videos to your online store from these platforms keeps your site lightweight and fast. Avoid uploading large video files directly to your website, as this can increase loading times and hurt your site’s performance.
Do I need any coding knowledge to add videos to my product gallery?
No coding is required if you use a plugin designed for WooCommerce video galleries. These tools provide easy settings and drag-and-drop options so you can upload or embed videos without editing any code. Most plugins also come with step-by-step setup instructions.
All of the tutorial content on this website is subject to
Hostinger’s rigorous editorial standards and values.

Dennis Hammer is a content strategist, web developer, and WooCommerce store owner. He has extensive experience building and growing online stores for diverse audiences as well as crafting engaging and strategic storytelling content. Follow him on LinkedIn.


![[Study] U.S. Government CMS Preferences and Trends](https://envo.app/wp-content/webp-express/webp-images/uploads/2024/06/study-u-s-government-cms-preferences-and-trends.jpg.webp)

