May 15, 2024
By transforming your traditional paper menus into dynamic, interactive digital menus accessible with a simple QR scan, you provide your customers with convenience and a touch of technological sophistication that can set your establishment apart.
What Is a QR Code Menu?
A QR code menu is a digital format of a restaurant’s menu that is accessible by scanning a QR (Quick Response) code with a smartphone. Whether it’s linked to a Menu web page or a PDF file, QR code menus allow customers to view menu items, prices, and descriptions on their devices, providing a contactless dining experience.
This guide will outline eight steps to creating a QR code for your restaurant menu. Additionally, to inspire further interest, we will also explore a variety of QR code use cases applicable to the hospitality industry.

Let’s dive into how you can generate a QR code menu for your restaurant in eight steps.
Before generating a QR code menu for your restaurant, thoroughly prepare and organize it to ensure it receives a positive response from your customers. Here’s what you need to consider when creating your restaurant menu:
- Selecting a cuisine focus – Start by defining the type of cuisine your restaurant will offer, like traditional Italian dishes or modern fusion cuisine. Defining focus will set the tone for the ingredients, preparation styles, and menu layout.
- Curating the menu items – This step helps you balance variety with your kitchen’s capacity to ensure high-quality preparation and timely service. Consider including signature dishes that can attract customers.
- Creating menu categories – Organize your menu logically by categorizing items into sections, such as appetizers, entrees, desserts, and beverages. Categorization helps customers easily navigate the menu and make selections based on their preferences.
Additionally, you can analyze market trends and customer preferences to include popular and profitable items.
One of the easiest ways to do this is to review your competitors’ online menus and promotions to see what’s popular in your area. Observing what works for others can provide valuable insights.
Once your menu is planned, it’s time to organize it on your restaurant site menu page.
If you don’t already own one, the easiest way to build a restaurant page is to use an online site builder like Hostinger Website Builder. With its tooling, you can create a page or even a multi-page website in minutes – all you’ll need to do is select a template, upload your own images, change the text, and you’re good to go.
Choose a clean and accessible layout that makes navigation simple for users. Also, consider the customization options, as you should be able to adjust the color scheme and fonts to make the design match your restaurant’s brands.
In this tutorial, we’ll use our Campos template as an example.
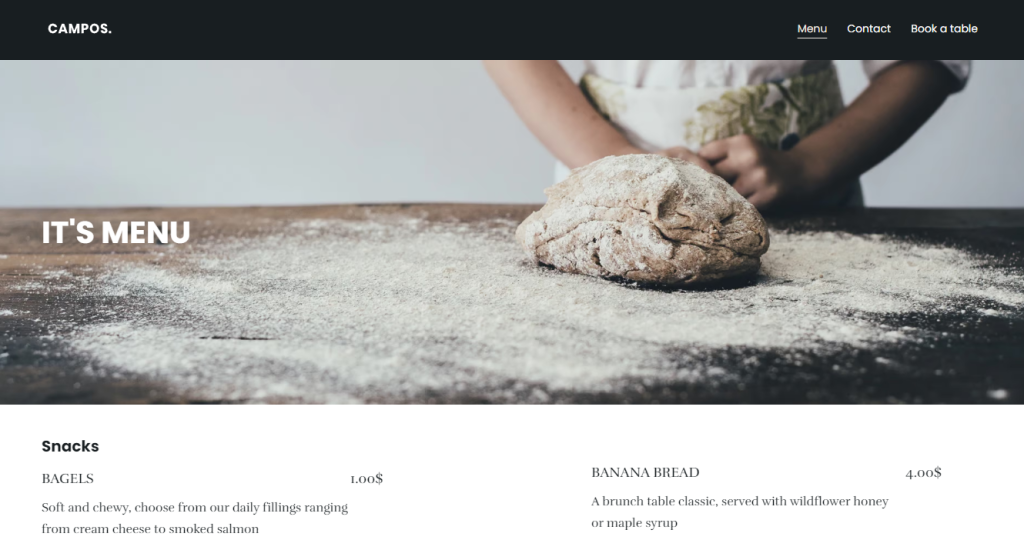
When setting up the page, don’t just list your menu items.
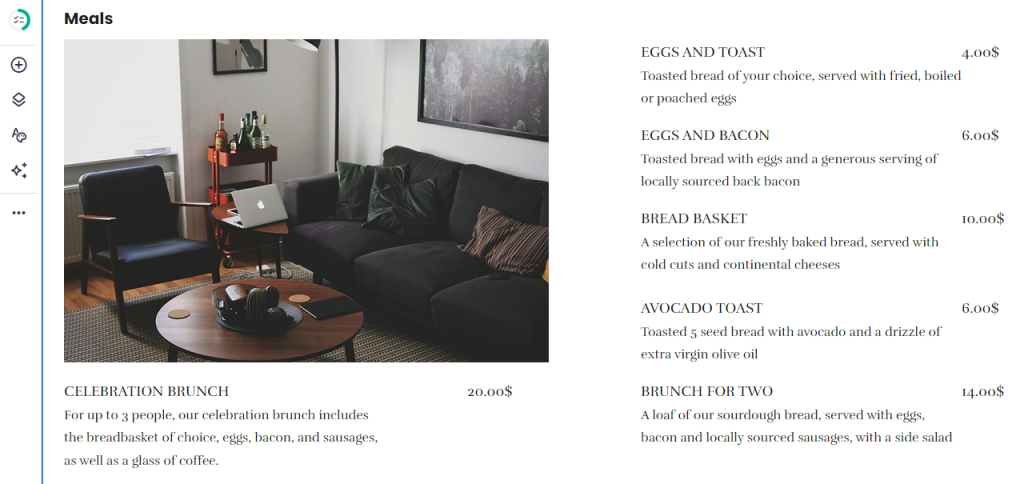
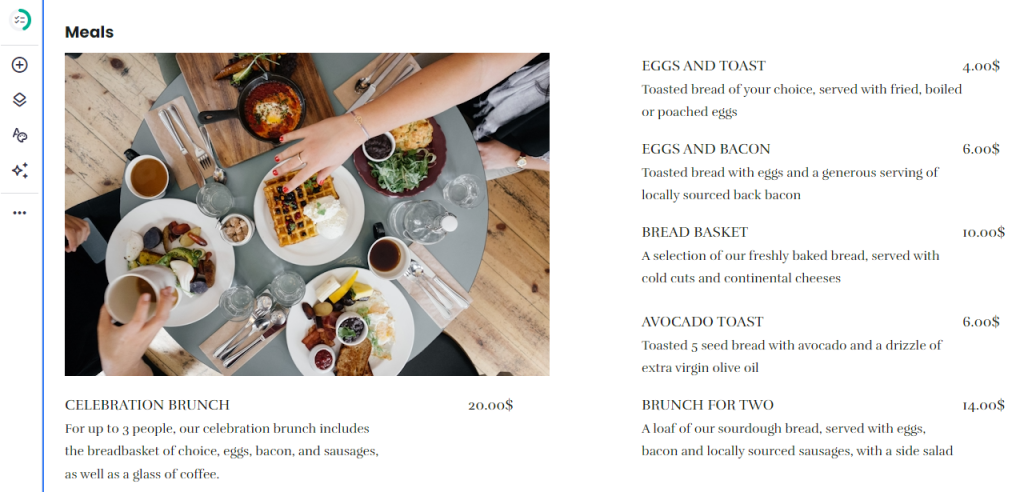
You should include concise yet detailed descriptions for each meal, mentioning key ingredients and any unique preparation methods that differentiate your dishes. By clearly displaying the item price, you can help customers make informed decisions based on their budget.
To entice site visitors, complement your menu descriptions with appealing images of your dishes. Make sure to upload high-quality, web-optimized images to ensure your online menu loads in a timely manner.
Here’s how you can add images on Hostinger Website Builder:
- Navigate to Add elements → Image. Then, a default image will appear within the interface.

- Drag and drop the image to where you want to display it. If necessary, use the resize feature to make it smaller or bigger.
- Next, replace the image to match your menu and description. Click on the element → Edit image. On the Image settings pop-up window, click Replace image.
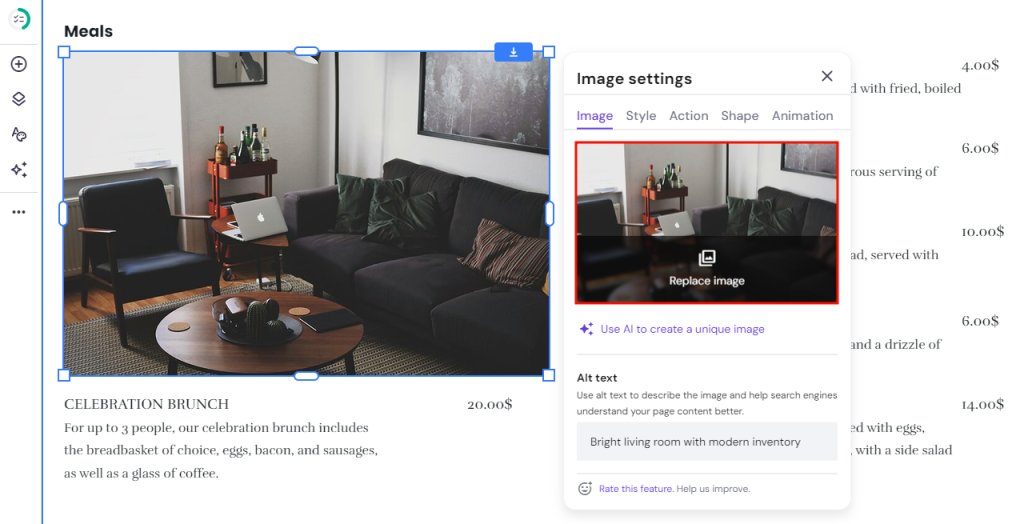
- In this example, we’re going to use one image to represent a section. Let’s highlight the signature dish.
Before generating your QR code restaurant menu, make sure everything is in place.
A well-organized menu can boost your restaurant’s sales. By making it easy and appealing for customers to view your dishes, you encourage more interactions and orders.

3. Prepare Your Website
It’s time to generate a QR code for your restaurant menu. With Hostinger Website Builder, the process is simple. After you’ve connected a domain name and published your site, you can easily create QR codes using our built-in QR code generator.
Important! Before launching your new restaurant site, ensure you have double-checked your content. Check for errors in your menu descriptions, prices, and contact information, and ensure that all links are functioning correctly to provide a seamless user experience.
Let’s go over the steps for connecting a domain name:
- Connect a custom domain name by clicking the Connect domain button on your hPanel’s Websites tab.
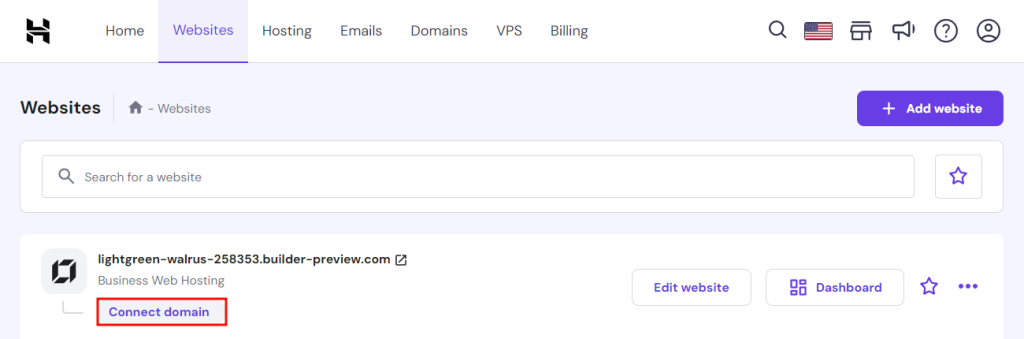
- Or, click on your temporary domain on the builder’s interface → Connect your own domain.

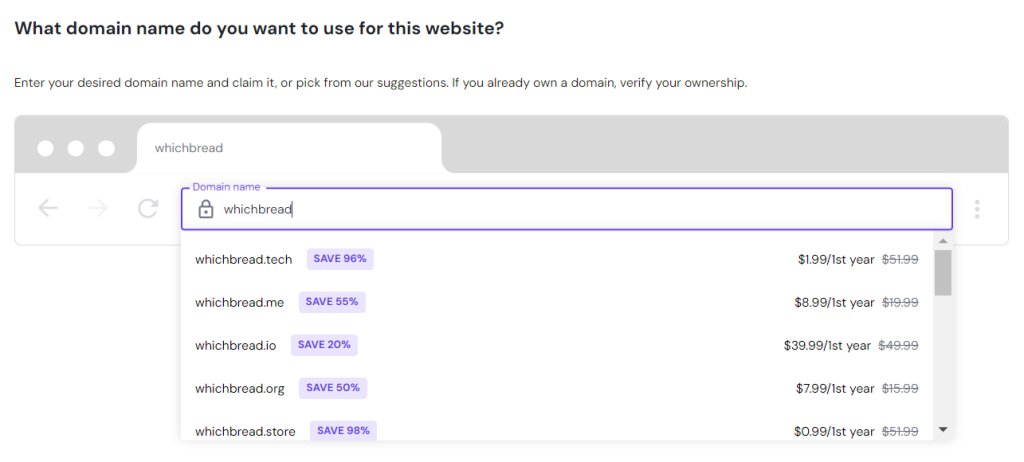
- Type in your desired domain name in the text box. The tool will check its availability and offer possible suggestions.
- Check if your contact information is correct. Then, go to your email and click on the link to verify your domain name registration.
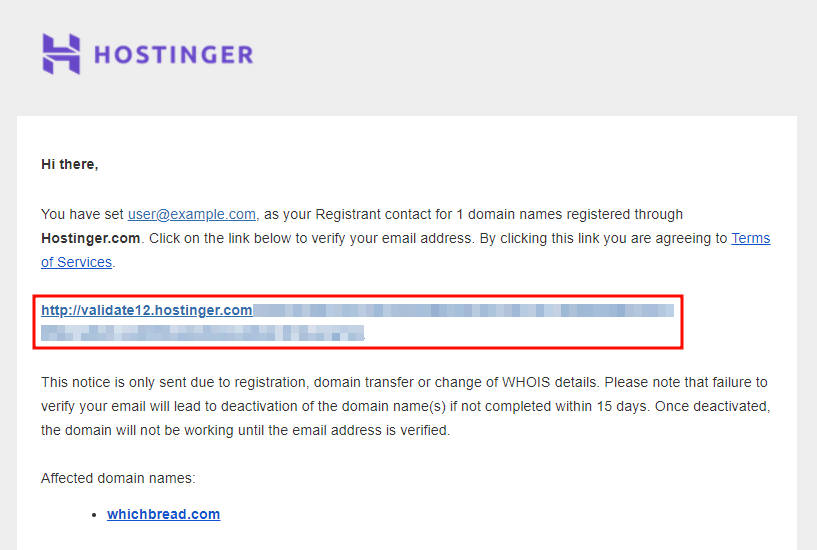
- You should receive a confirmation notification, like this:

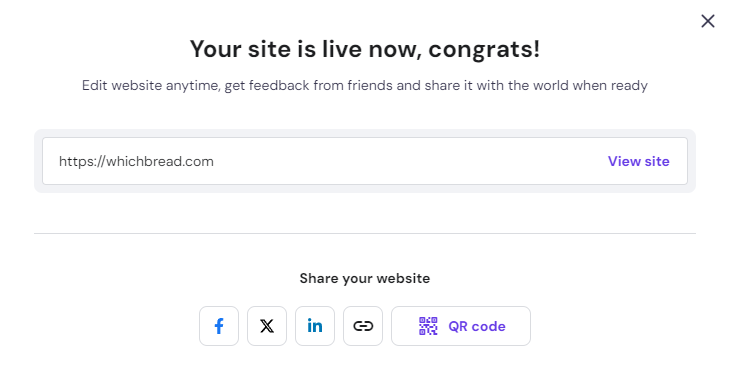
- Let’s go back to the site builder interface and see if your new domain name is connected.

- As your restaurant site is now connected to the domain name, click Go Live to publish it.
4. Create and Customize Your Menu QR Code
Now that your site is live, you should be able to access the QR code generator. Here’s the step-by-step guide for creating your contactless menu:
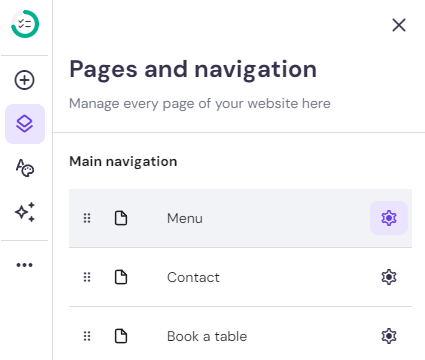
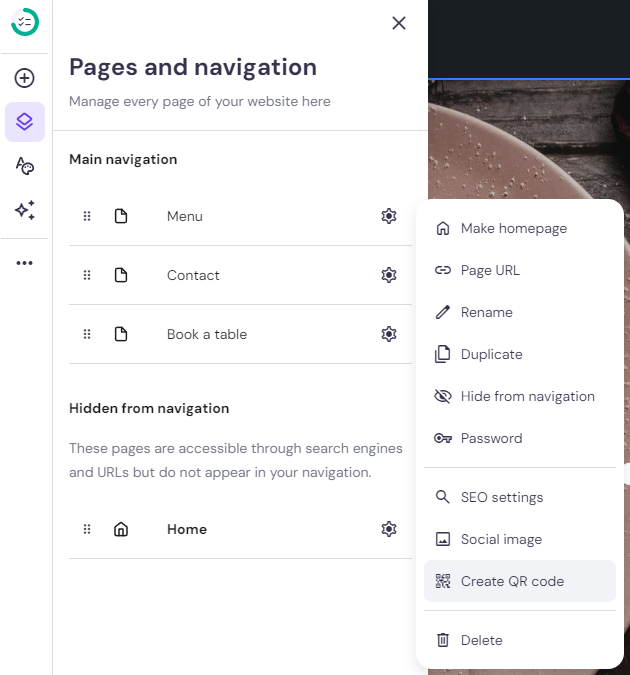
- Click Pages & navigation → the Settings button to the side of the Menu option.
- Click Create QR code.
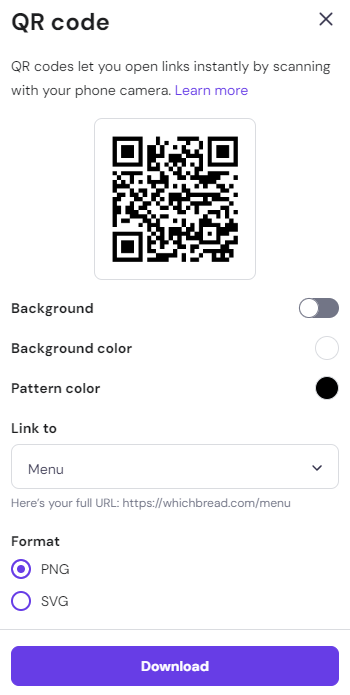
- On the QR code pop-up window, you can customize the code’s background and pattern colors. Check if the Link to dropdown is set to the Menu page and choose the format you want – PNG or SVG. Click Download.
5. Test the QR Code
Testing your QR code ensures that once it’s displayed in your restaurant, your guests will have a seamless experience accessing your menu. This step is crucial to avoid any potential frustration and ensure customer satisfaction.
Here’s how you can test the QR code using your local computer:
- Locate the QR code – Navigate to your Downloads folder, where the QR code image file is likely saved after creation. This is typically accessible via File Explorer on Windows or Finder on macOS.
- Open the QR code – Double-click the QR code file to open it. You can view the image to check for any visible issues like blurring or distortion that might affect scannability.
- Test the QR code – Use a smartphone or tablet with a QR code scanning app. Point the device’s camera at the QR code on your computer screen. Most modern devices have built-in QR code scanners in the camera app.
- Check the redirect function – Ensure that the QR code correctly redirects to the intended online menu. Check that the menu displays properly on your device, with all links and functionalities working as expected.
- Test on multiple devices – To ensure compatibility and functionality, scan the QR code with different smartphones and tablets, as different devices might have slight variations in camera quality and scanning capabilities.
If any issues arise during the testing process, adjust the QR code as needed. This might involve increasing the size for better readability or verifying the URL it links to.
Effectively displaying your menu QR codes is important for maximizing their use and ensuring a seamless dining experience for your customers. Here are some strategic QR code placements in your establishment:
- Tabletops – Place the QR code in a noticeable spot on each table, such as on a tent card or a small standee. This ensures that guests can easily scan the code from their seating position without having to move around.
- Entrance area – Position a large QR code on welcome signs at the entrance so guests can scan and browse the menu while waiting to be seated.
- Wall decals – Use wall decals at eye level in strategic locations such as near the bar, waiting area, or restrooms where guests tend to pause and have time to scan the code.
- Restaurant windows – Displaying QR codes on the windows of your restaurant is a highly effective strategy to attract passersby before they enter the store.
You can also display your new digital menu QR code on online platforms, including your site’s homepage. Upload your restaurant menu QR code to Hostinger Website Builder through Add element → Image. Then, replace the default image with your QR code.
Consider adding the menu QR code to your social media pages to allow potential customers to explore your menu online when visiting your account.
7. Educate Your Staff and Customers
Ensuring that both your staff and customers are comfortable with the QR code menu system is key to a smooth dining experience.
You can start internally by conducting staff training sessions on how the digital QR menu works. Include practical demonstrations on how to scan the code and navigate the digital menu. This empowers your staff to assist customers effectively.
On top of all, make it easy for customers to get help by having staff readily available to assist with scanning the code or navigating the menu. Consider creating simple, visual instruction cards that can be placed on tables or near the entrance.
Alternatively, a brief, clear demonstration of how to access the menu can be a part of the greeting procedure. This proactive approach can enhance the customer’s experience, especially for those who may not be tech-savvy.
Maintain an updated and dynamic digital menu to ensure that your restaurant remains competitive and relevant.
Here’s how to keep your digital menu fresh:
- Seasonal updates—Adjust your menu for seasonal ingredients and dishes to keep it exciting for returning customers. Using in-season produce also allows you to manage costs more effectively.
- Special promotions – Use the digital menu to highlight special promotions, happy hours, or event-specific menus. Since updates can be made quickly and at no additional print cost, you can experiment with different offers.
- Feedback incorporation – Regularly gather feedback from customers and staff about the menu. Use this information to make informed decisions about which dishes to keep, modify, or remove.
- Technology utilization – Take advantage of digital menus’ flexibility to include interactive elements such as links to dish descriptions, preparation videos, or the option to customize a dish order.
Best Practices for Using QR Codes
QR codes are a versatile tool for improving customer experience, streamlining service, and boosting your marketing efforts. Let’s look at some ways to maximize their effectiveness for your restaurant.
Highlight the Importance of Location and Visibility
Placing QR codes in optimal locations is crucial for maximizing their use. The proper placement helps ensure that the QR code catches the eye of every customer who walks in or sits down, inviting them to explore your offerings.
Ensure your QR codes are:
- At eye level – Position QR codes where they are easily visible, such as on table tents, at the center of tables, or alongside condiments.
- Near the entrance – Consider placing the code near the entrance or waiting area so guests can browse the menu while waiting to be seated.
- On promotional materials – Include QR codes on flyers, posters, and billboards related to your restaurant to attract passersby.
Ensure QR Code Clarity
Make your QR codes accessible to everyone with a smartphone to ensure an excellent user experience.
To guarantee that your QR codes function effectively, here are some aspects you want to pay attention to:
- Resolution – Always print QR codes at the highest resolution possible to avoid blurriness, which can hinder scanning.
- Size – The QR code should be large enough to be scanned comfortably from a reasonable distance. A general rule is that the scanning distance is ten times the width of the QR code.
- Contrast – Use a high contrast between the QR code and its background, typically black on white, to ensure it can be read easily by camera scanners.
Offer Alternatives for Non-tech Savvy Customers
While QR codes are convenient, offer these alternatives to ensure every customer enjoys a comfortable dining experience, regardless of their familiarity with technology:
- Physical menus – Keep a few printed menus on hand for those who prefer them or find digital menus challenging.
- Assistance offers – Train staff to assist anyone who struggles with scanning the QR code or navigating the digital menu. A brief explanation or a quick demonstration can go a long way.
- Simplified instructions – Display simple, clear instructions on how to use the QR code.
Use QR Codes for Marketing and Promotions
Integrating QR codes into various other aspects of customer interactions can help you create more encouragement for engagement and marketing. Here are some more QR use cases to consider:
- Special events – Link QR codes to a webpage detailing upcoming events or special menu nights, encouraging more customers to return.
- Loyalty programs – Use QR codes to sign up customers for your loyalty program, offering rewards or discounts after a certain number of visits.
- Feedback collection – Direct customers to a feedback form via a QR code to gather valuable insights and reviews directly after their dining experience.
By appropriately using QR codes as marketing and promotion assets, you can improve customer experience, which leads to increased loyalty and repeat business.
Conclusion
Transforming paper menus into interactive digital ones with a simple QR scan offers not only convenience but also a modern touch for your establishment. Here’s a short recap on how to generate a contactless menu for your restaurant:
- Prepare your menu by choosing a cuisine focus, curating menu items wisely, and organizing categories logically to ensure a positive customer response.
- Create your digital menu page with an intuitive layout and design.
- Activate our QR code generation tool by connecting a domain name and publishing your site with Hostinger Website Builder to easily create QR codes.
- Create and customize the QR code for your restaurant menu.
- Test your new QR code menu to ensure it works.
- Display the code on strategic places, like tabletops and entrance areas.
- Educate staff and customers to ensure a smooth dining experience.
- Keep your digital menu updated to keep it relevant and competitive.
Adopting QR code menus is more than just a technological upgrade — it’s about rethinking how you connect with and serve your customers in a digital world.
As you move forward, continue to embrace these innovations, ensuring that your restaurant not only survives but thrives in the evolving landscape of the hospitality industry. Good luck!
Let’s answer four of some of the most frequently asked questions about how to create a QR code for your restaurant menu.
Are QR Code Menus Safe to Use?
Yes. QR code menus are safe when you use secure and reliable QR code generators and ensure your linked content is hosted on a secure platform.
Can I Customize the Appearance of the QR Code for My Menu?
Yes. With Hostinger Website Builder’s QR code generation tool, you can customize your code’s background and pattern colors.
Can I Track Analytics or Get Insights From the Usage of the QR Code?
Premium QR code generation tools, like Unicode and Scanova, often have analytics features to track metrics associated with your QR code’s usage. These metrics might include scan count, device type, location, and time and date.
Can I Embed Additional Information or Images Within the QR Code for the Menu?
Rather than embedding information and images directly within the code, you can use it to link to URLs hosting these resources, such as a web page or a digital PDF menu. This way, diners can access all content using the same QR code, simplifying their experience.

Linda is a seasoned Content Writer specialized in website creation. With her passion for the written world and obsession with helping others, her goal is to deliver resourceful content pieces for all skill levels. When she’s not writing, Linda likes to cross stitch and watch films. Follow her on LinkedIn.