The rsync command is one of the most popular and powerful tools in Linux for synchronizing files and directories between different locations. It is widely used for backups, remote file transfers, and directory syncing, offering robust features like incremental file transfers, compression, and file permission preservation.
In this article, we’ll explore the basics of rsync, along with practical examples to help you master its usage.
Table of Contents
Basic Syntax of rsync:
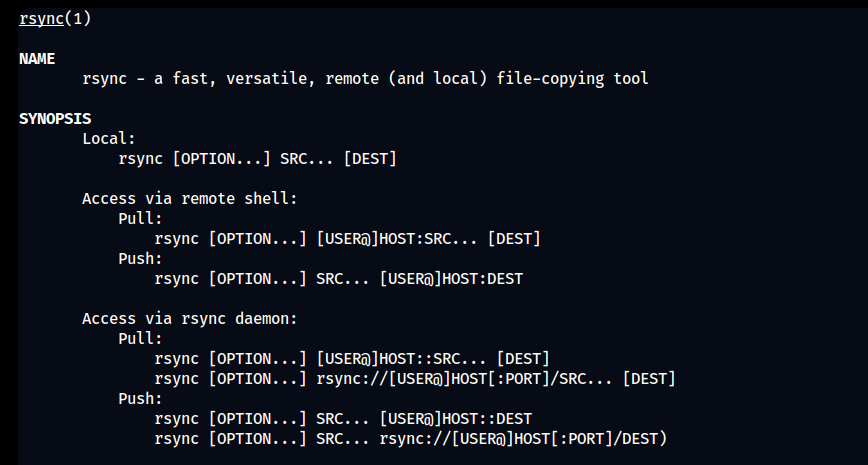
rsync [OPTION]... SRC [SRC]... DEST
Where SRC represents the source directory or files, and DEST represents the destination.

Commonly Used rsync Options
-a: Archive mode, which preserves symbolic links, file permissions, timestamps, etc.-v: Verbose, to show detailed output of the operation.-z: Compresses file data during the transfer.-P: Displays progress during the transfer and allows partial transfers to resume.--delete: Deletes files from the destination that no longer exist in the source.-r: Recursively transfer directories.
Examples of rsync in Action
1. Basic File Synchronization
This simple example copies all files from the source directory to the destination.
rsync -av /source/directory/ /destination/directory/
The -a flag ensures that all file attributes (permissions, timestamps, etc.) are preserved, while the -v flag provides a verbose output to show progress.
2. Synchronizing Files Over SSH
rsync can be used to securely copy files between two remote systems over SSH:
rsync -avz -e ssh /source/directory/ user@remote:/destination/directory/
Here, the -e ssh option tells rsync to use SSH for the transfer. This is especially useful for secure backups to remote servers.
3. Excluding Files and Directories
To exclude specific files or directories during synchronization, use the --exclude option:
rsync -av --exclude 'file.txt' /source/directory/ /destination/directory/
This will copy everything except the file named file.txt.
4. Resuming Incomplete Transfers
If a file transfer is interrupted, you can resume it with the --partial option:
rsync -avP /source/directory/ /destination/directory/
The -P flag combines --partial and --progress, which helps track the progress of the transfer and resume partial file transfers.
5. Deleting Files in Destination
To delete files from the destination that no longer exist in the source directory, use the --delete option:
rsync -av --delete /source/directory/ /destination/directory/
This ensures that the destination mirrors the source by removing any files in the destination that have been deleted from the source.
6. Syncing Files Between Local and Remote Systems
This example synchronizes files from a local directory to a remote server:
rsync -avz /local/directory/ user@remote:/destination/directory/
Similarly, files from a remote server can be synced back to a local system using:
rsync -avz user@remote:/source/directory/ /local/directory/
7. Backing Up a Directory
You can easily create backups of directories with rsync. This example creates a timestamped backup:
rsync -av /source/directory/ /backup/directory/$(date +%F)
This command will copy the contents of /source/directory/ to a directory in /backup/directory/ with a name based on the current date (e.g., 2024-10-01).
Complimentary commands
iostat: rsync can affect disk I/O when transferring large files. You can monitor disk performance during transfers using tools like df and du: Before syncing, you might want to check disk space with the manage local and remote file transfers while preserving file integrity and security. For secure file transfers over SSH, check out our guide on the scp command in Linux.
- scp: Securely copy files between hosts.
cp: Copy files and directories.tar: Archive files and directories.
For more advanced usage and options, refer to the rsync man page by running man rsync.


