Jun 06, 2025
Jordana A.
10min Read
A personal brand website is a dedicated platform to showcase your skills, share personal experiences, and tell your story.
Whether you’re a freelancer, an entrepreneur, or a professional, having a website boosts your visibility, builds trust, and connects you with potential customers or employers.
We’ll walk you through creating your personal website with a .icu domain name on Hostinger. Don’t worry, this guide is beginner-friendly and perfect for all skill levels.
What is a .icu domain and why choose it?
A .icu domain is part of the new generic top-level domain (gTLD) program. It’s short for “I see you,” which is a fun and catchy phrase you can use to connect with your audience and highlight inclusiveness in your brand.
The intervals.icu platform is all about tracking and analyzing athletic performance ‒ essentially “seeing” your fitness data, progress, and patterns that might otherwise be invisible. The .icu extension (“I see you”) perfectly aligns with this concept of visibility and observation.
Managed by the ShortDot registry, the domain is a creative alternative to crowded options like .com and .org. Having more availability means it’s easier to grab the name that aligns with your brand.
The .icu domain extension is also known to be affordable. At Hostinger, you can get a .icu domain for as low as $0.99 for the first year at Hostinger, while .com domains usually cost around $9.99 for the same period.
Finally, .icu isn’t specifically limited to any industry or country. That makes it ideal for any kind of website, no matter your niche or location. Looking to give your brand a modern, future-forward edge? Whether you’re a thought leader, a content creator, or a professional in a niche industry, .icu might just be the domain that sets you apart.
Why choose Hostinger for your personal website?
If this is your first time creating a website, Hostinger makes the process as easy as it can get. Our AI website maker offers a streamlined onboarding process for beginners and anyone looking to launch their website quickly.
As it’s AI-powered, you have three ways to build your personal site ‒ generate it using prompts, pick a ready-made template, or create it from scratch using our easy drag-and-drop editor.
Starting at $2.99/month, all plans include web hosting, AI tools for content creation and search engine optimization (SEO), and marketing features like mailboxes and the Google Ads app.
Plus, any annual purchase includes a free domain for one-year, letting you build your website for less than what you’d pay for a cup of coffee.
You can try the platform risk-free with a free trial. There’s also a 30-day money-back guarantee if you decide to purchase.
Step-by-step guide to creating your personal brand website
If you want to jump straight to the technical side of building your personal website, skip to Step 3. Otherwise, let’s start with the most basic part: shaping your personal brand.
Step 1: Define your brand foundation
Your brand shapes how people see and remember you. It shows your values and personality ‒ everything that makes you, you. With over a billion websites online, you need a strong brand to stand out.
Start by defining your target audience and your website’s main purpose. When you know who you want to reach and what you’re offering them, you can tailor your website’s design and content to attract the right visitors and make your message clear.
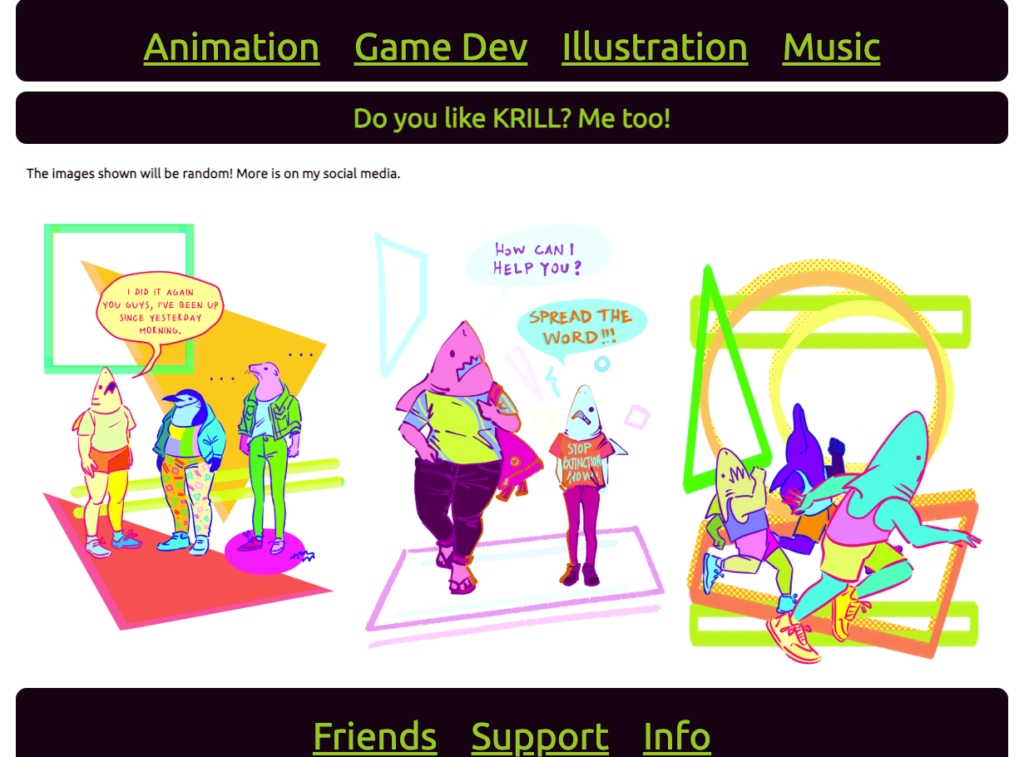
For example, the freelance artist RAPIDPUNCHES (krill.icu) showcases bold visuals to attract clients looking to collaborate on creative projects.
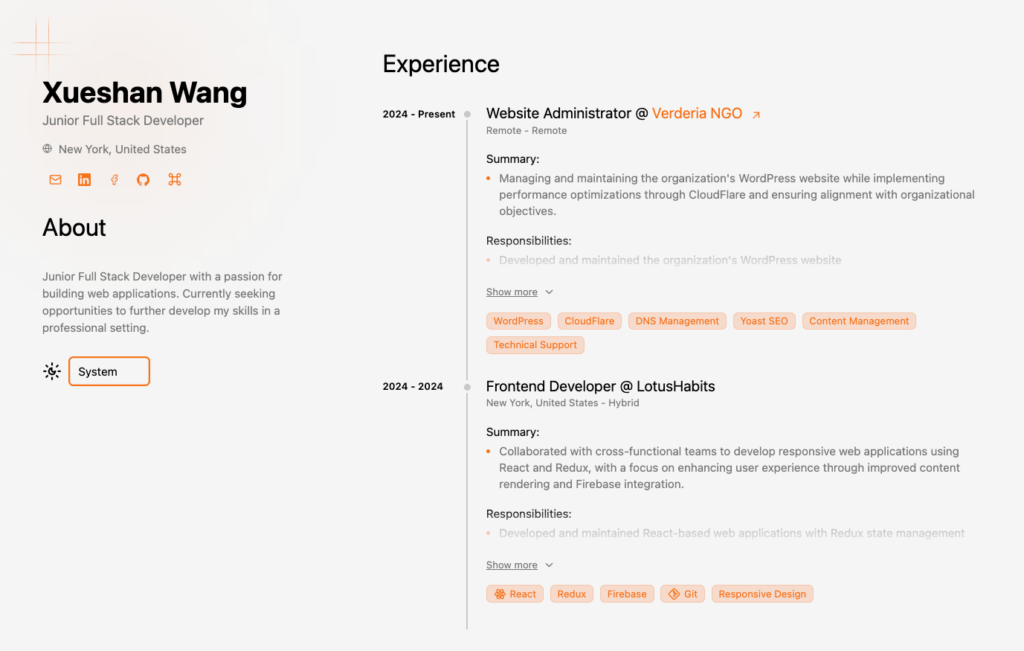
Xueshan Wang (portfolio.cytrogen.icu), a full stack developer, takes a different approach with a text-focused website. Designed to attract employers and support job proposals, it emphasizes education and work experience.
Here are several guiding questions to fine-tune your brand message:
- What’s the core message you want people to remember about you?
- If you offer a product or service, how does it benefit your target audience?
- What sets you apart from others in your field?
- What values or beliefs drive your work?
- How do you want people to feel when they visit your website?
Check out our article on building a brand from scratch for strategies and examples.
Step 2: Build your online presence
Every website needs a domain name as its online address. Often being the first thing that people see, your domain is a crucial part of your branding effort.
Follow these tips to choose a domain name that’s purposeful and fits your brand strategy:
- Keep it short and simple. Avoid using numbers, double letters, and hyphens as they make your domain harder to read and remember.
- Choose the right TLD. Some extensions suggest a specific purpose, which can shape how people see your site before they even visit. With .icu, this isn’t a concern.
- Check for trademarks. Using a protected domain or one too similar to an established brand can damage your reputation or lead to legal issues.
- Think long-term. Avoid names tied too closely to one niche if you plan to expand or change direction. For example, including keywords like “developer” or “fashion” in your domain could box you in if you decide to branch out down the line.
Once you have several good options, check their availability using Hostinger’s domain name checker. Enter them one by one and see if their exact matches are taken.
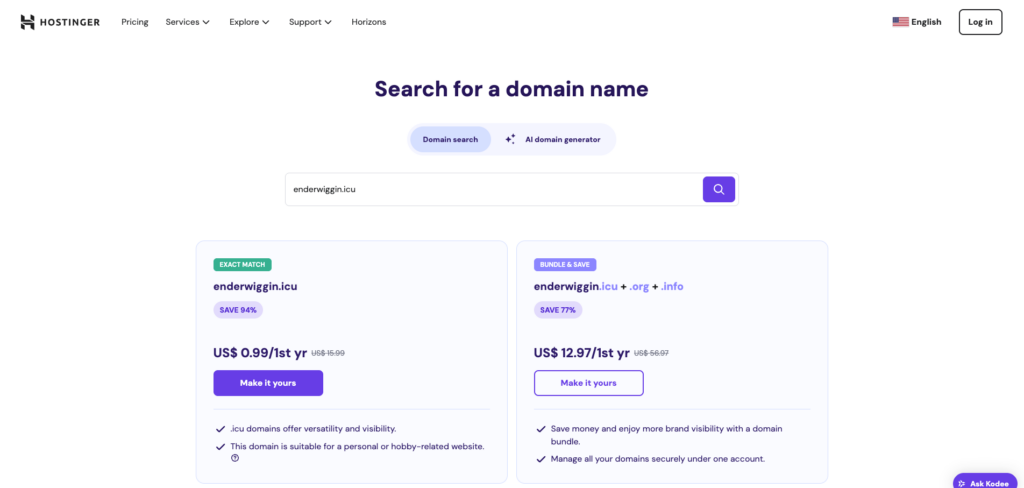
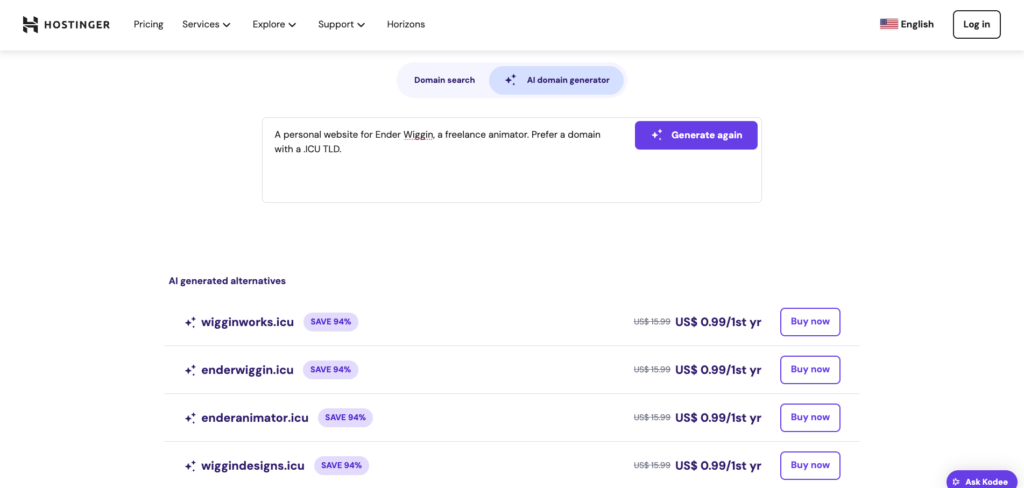
If you need help brainstorming or finding alternatives, use the AI domain generator to explore possibilities based on your brand description.
Domain Name Checker
Instantly check domain name availability.
Did you know?
You can buy a domain name and web hosting separately, but it’s usually easier and more cost-effective to get a hosting plan that includes a free domain ‒ like the ones Hostinger offers.
Step 3: Make your website
The next step is to decide how you want to build your personal website.
We’ve gone over the advantages of using Hostinger Website Builder for your project. Getting started is easy ‒ just pick a plan, make your purchase, and follow these easy onboarding steps:
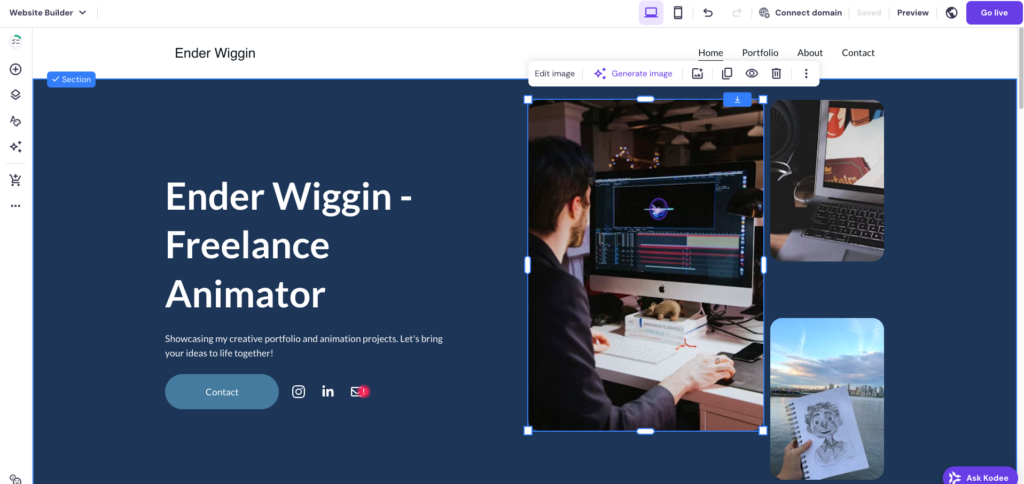
- Enter your brand name and describe your ideal personal website in the AI website creation form. The more detailed your prompt, the more accurate the result.
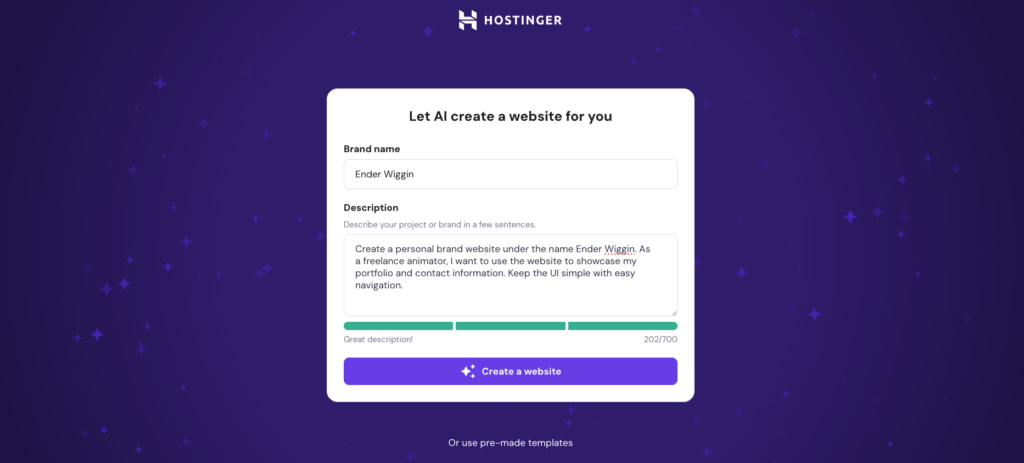
Here’s a good prompt example:
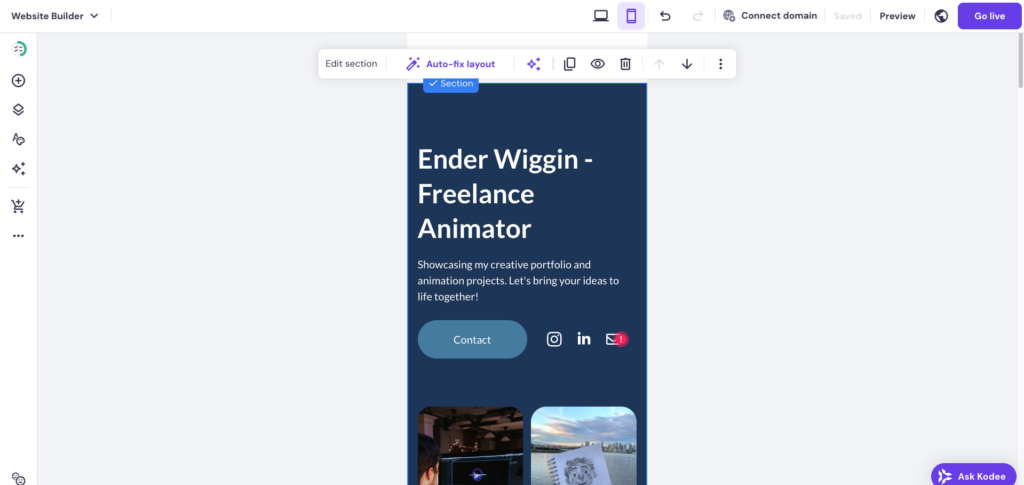
Create a personal brand website under the name Ender Wiggin. As a freelance animator, I want to use the website to showcase my portfolio and contact information. Keep the UI simple with easy navigation.
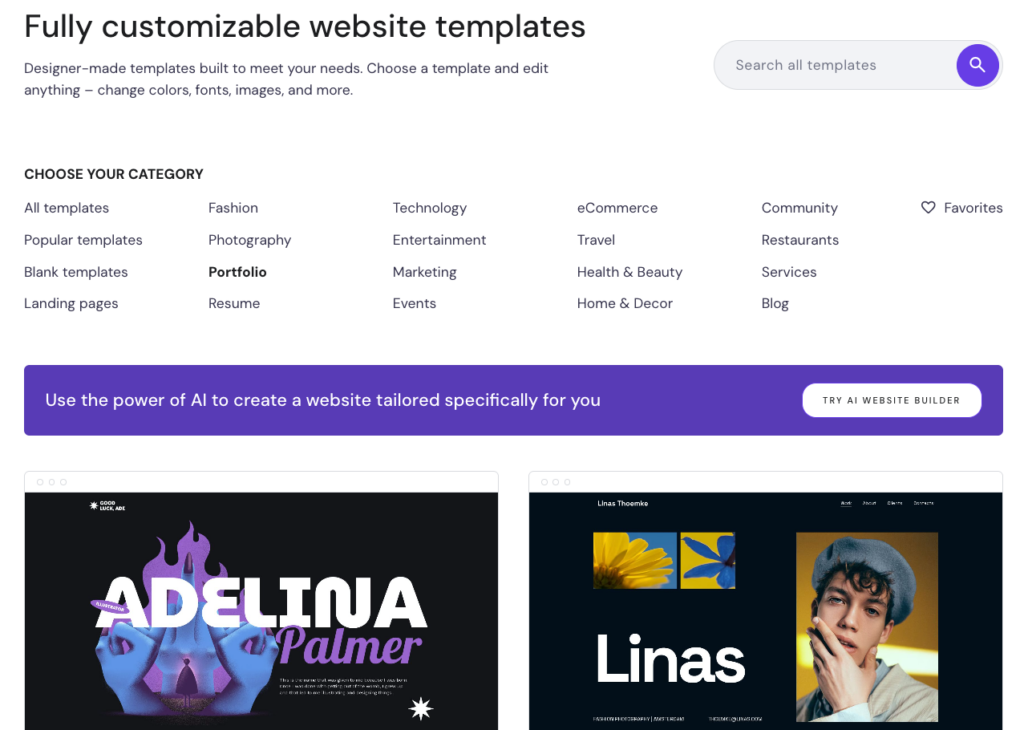
- Alternatively, use pre-made templates and pick a design that fits your brand. Our website template library is divided into categories ‒ Portfolio, Blog, and Resume are great starting points for your project.
- In both cases, the next step will take you to the editor, where you can make further changes to the design. To customize an element, click on it to display a toolbar with design options. Access AI tools, add pages, or insert elements from the left sidebar.
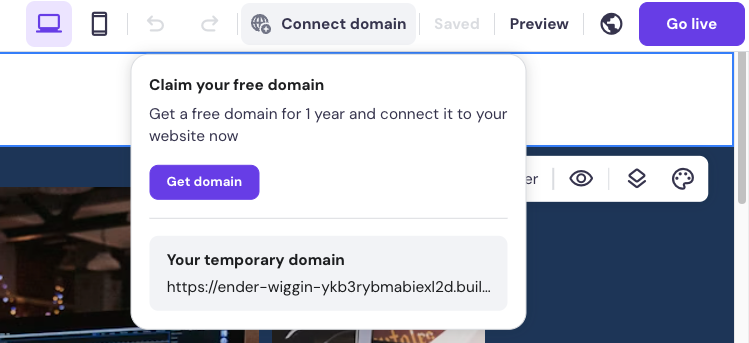
- If you purchased an annual or a longer plan, click Connect domain → Get Domain in the top bar to claim a free one for the first year. Simply follow the steps and provide your contact details to register.
- Once you’re happy with your website, click Go live to launch it. Don’t worry, you can still update the design and add content ‒ we’ll cover more on that in Step 4.
Want more options to compare? Here are the key features to consider when choosing a website builder for your personal website:
- Ease of use. A drag-and-drop editor is especially helpful if you don’t know how to code. At the very least, the builder should offer learning resources like step-by-step guides.
- Design flexibility. Access to a wide range of templates, AI tools for personalized designs, and customization options makes building your ideal site easier.
- SEO. A good platform optimizes your site for search engines from the start and gives you tools to improve visibility over time.
- Support. Check how easy it is to get assistance when you need it and whether the support channels suit you.
- Value for money. Watch out for extra fees on features and tools that could strain your budget.
- Ecommerce functionality. Make sure your chosen website builder can support your business needs if you plan to use it as a revenue channel in the future.
Did you know?
Hostinger’s Business Website Builder plan offers ecommerce and AI tools to optimize your site, create content quickly, and enable transactions.
Step 4: Create your content
The content for a personal brand website should reflect who you are as a professional and individual. Organize your content into different pages to make it easy for visitors to find what they need.
There’s no strict rule about which pages to have, but most personal websites include these:
- Home. As the most important page in your site, it should display essential information about what your personal brand is about. Include links to guide visitors to other pages for more details.
- About. Share your professional journey, passions, and what makes you unique.
- Portfolio or Work. Show off your projects, achievements, or services. Include quality visuals and clear project descriptions to help visitors understand your skills and see your value.
- Contact. Let people know how to reach you ‒ email, social media, or a contact form.
How you organize your content impacts user experience, so pay extra attention to your website’s structure. For example, don’t clutter your pages with too much text or visuals – focus on quality over quantity.
Also, don’t be afraid to inject some personality into your content. This helps you make a lasting impression and connect with readers.
Check out our best personal website examples for design and content inspiration.
Step 5: Optimize and launch
Great content means nothing if people can’t find it, and for that you’ll need to optimize it for search engines.
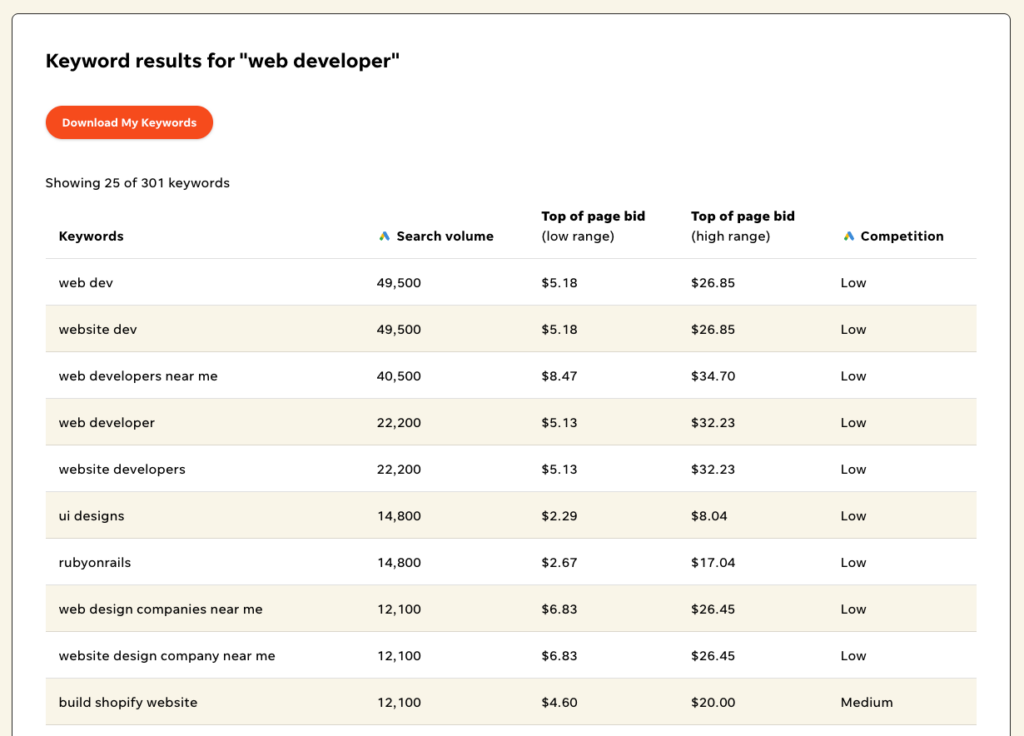
One of the most fundamental SEO strategies is using keywords your audience would search for in your page titles, headings, and throughout your content. Adding keywords related to your brand helps search engines understand what your website is about, so they can show it to the right people.
Use a keyword research tool like WordStream to find potential keywords to add. Make sure their placement is natural and are spelled correctly.
Next, check how your website looks on a phone or tablet. Most people browse on mobile, so it should look good and work smoothly on all screen sizes.
If you’re using Hostinger, all templates and AI-generated websites are already designed to be mobile-friendly. Plus, you can create unique designs for mobile and desktop versions.
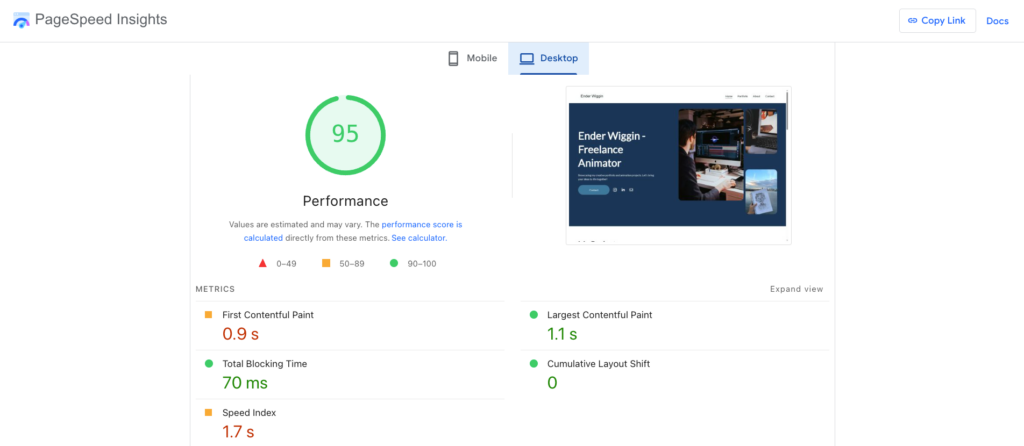
Another optimization Hostinger handles behind the scenes is page speed. Google recommends that web pages load in under two seconds because slower sites risk losing visitors.
We help you meet this goal by optimizing all the images and videos you upload to the website. Plus, we use a content delivery network (CDN) ‒ worldwide servers that deliver your site from the location that is closest to your visitor, making it load faster.
You can test your website speed using tools like GTmetrix or PageSpeed Insights. Just enter your website address, and the tool will measure its speed and highlight performance issues.
Our SEO guide explores key strategies in detail and shares easy tips to help you get started. Give it a read to step up your SEO game.
Beyond adding content and optimizing for search engines, complete this basic website launch checklist to get it ready:
✅ Collect feedback and run usability tests to fix issues affecting user experience.
✅ Test interactive elements like forms and buttons to make sure they work properly on desktop and mobile.
✅ Verify legal compliance, especially if you plan to collect user data. Make sure you have a privacy policy, cookie consent, and follow rules like the General Data Protection Regulation (GDPR) for EU visitors.
✅ Set up a professional business email to enhance credibility and build trust. Every Hostinger Website Builder plan comes with email out of the box, along with marketing tools to simplify communication with your audience.
✅ Set up tools like Google Analytics to track visitors from day one and to see what works and what needs improvement.
Step 6: Grow your brand online
After getting your website up and running, shift your focus to building a strong online presence. This involves promoting your site across different channels and growing your audience.
Social media is a simple way to tackle both. Save time by focusing on platforms where your audience is most active. For example, Instagram and TikTok are more popular with younger users than Facebook.
No matter which platforms you use, keep your brand consistent across all of them. A consistent style and message build trust and make you memorable, making your visitors more likely to engage.
As your network grows, so will your opportunities. With each new project or work experiencee, make sure to update your website to reflect it. Even small updates show search engines your site is active, helping it appear more in search results.
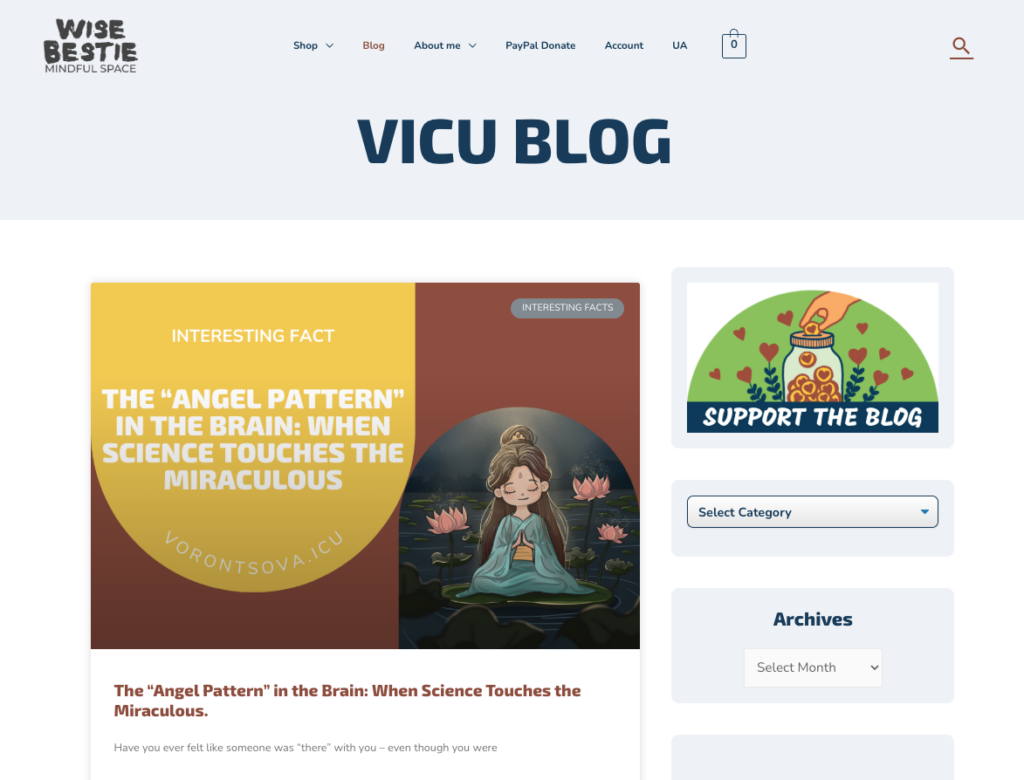
If you don’t have any news or projects to share, try blogging. Sharing insights, experiences, or advice through blog posts helps others and shows that you know your field, giving your credibility a solid boost.
Check out Helga Crow’s personal website (vorontsova.icu) to see this strategy in action. She weaves her art into blog posts about personal growth, adding value to the content while showcasing her skills as a digital artist.
Did you know?
Hostinger Website Builder offers a suite of AI tools to create and optimize your blog faster and more easily.
Step 7: Maintain and adapt
Remember the analytics tool you set up before launching your website? It’s time to use its data.
Track these metrics to spot bottlenecks and opportunities for improvement:
- Traffic sources. See where your visitors come from ‒ search engines, social media, referrals, or direct search.
- Top pages. Pages with a high number of views show the kind of content your audience values.
- Bounce rate. A high bounce rate means visitors leave after viewing one page, suggesting your content might not meet their needs.
- Pages per session. This metric shows how many pages a visitor views in one visit. A higher number usually means people are more engaged with your content.
- New vs returning visitors. If most visitors are new, your reach is growing, but retention may need work. More return visits mean your brand loyalty strategy is effective.
- Mobile vs desktop usage. This metric lets you optimize your design and content for the devices your visitors use most.
- Conversion rate. If you set goals like contact form submissions or downloads, track how often visitors complete them.
Embrace the need to change as an opportunity to grow and adapt. Stay on top of industry trends and explore new content ideas, but always stay true to your voice. Authenticity builds trust, and people visit your personal website because they want to see the real you.
Conclusion
A personal brand website gives you space to show who you are ‒ your skills, experience, projects, and even the stories that matter to you. With a .icu domain, it’s easier to grab a unique, memorable name without the high price tag of more saturated extensions.
As you build your site, focus on creating a strong brand, staying consistent across platforms, and updating your content regularly. A well-executed website will boost your online presence and advertise your work to the right people, opening doors to new opportunities.
Ready to get started? Head to Hostinger Website Builder and claim your free trial.
How to create a personal brand website with a .icu domain FAQ
Is a .icu domain good for SEO?
A .icu domain is a unique and easy-to-remember choice for your website. It performs just as well as generic domains for SEO. With good content and proper website optimization, a .icu domain can help your personal brand website climb search rankings.
Why do I need a website for my personal brand?
A personal brand website is your platform to showcase skills, share your story, and highlight what makes you unique. Whether you’re a freelancer, entrepreneur, or a professional, it helps increase your online visibility, build trust, and connect with potential clients or employers.
How often should I update my personal brand website?
You should update your personal brand website at least once every few months. Refresh the content to reflect new skills, projects, or achievements. Even small changes, like adding recent work or updating your bio, keep your site current and show you’re active, potentially improving the website’s search engine rankings.

Jordana is a Senior Content Writer at Hostinger with a background in Information Systems. She has over five years of experience in WordPress and is casually dabbling with PHP and MySQL. Her passion for writing and technology drives her to create tutorials for anyone wanting to build their online presence. Follow her on LinkedIn.